
Besnfoto Hiking and Travel Backpack Review
The Besnfoto Hiking and Travel Backpack is a durable, water-resistant bag that’s perfect for small to medium size capacity needs. Check out this full review!
Besnfoto Hiking and Travel Backpack - a great backpack for active, outdoor use!
Recently I was contacted by Besnfoto, a company that makes a lot of photographic accessories, about a new backpack design they were launching. It was promoted as being designed for hiking and travel - two of my favorite things - and they asked me if I would be willing to review it. I was about to take a little trip up to Colorado, specifically for hiking, and it seemed like a great fit. So they were kind enough to send me a review sample, I packed it full of the things I needed for my trip, and off I went.
I knew that this would be the perfect opportunity to see how it performed in real world situations.
You can find the bag here if you want to check it out (Amazon affiliate link - I earn from qualifying purchases). And below are some of their marketing photos of the bag. The rest of these photos were taken by me while out hiking with the bag full of gear.
DISCLOSURE: I was not paid for this review. All opinions and experiences are my own.
In short, it worked perfectly for me and performed exactly as the product descriptions indicated. I really like this bag. It is sturdy and durable, the comfort level is very high, and yes I even tested the water resistance and it was great!
One thing that I nearly ALWAYS want in a backpack is the ability to carry along my 16” MacBook Pro. I may do some editing on the road, along with all those other computer-related things, so any backpack that does not fit my laptop is a no-go. My laptop slid into the interior laptop section just perfectly.
In addition, the interior is spacious enough for a decent amount of gear. Now it won’t hold a TON of stuff - it’s billed as a small to medium-sized bag - but for a weeklong trip with a few choice items in tow, it was just the right size for that. You can of course configure the interior to fit your specific needs, thanks to the padded Velcro dividers that are included.
In addition to the laptop, for my photography needs the bag carried:
Sony A7R3 camera
Sony 24-70mm f4 lens
Sony 20mm f1.8 lens
Samyang 75mm lens
Sony RX100m7 camera
Battery chargers for both cameras
Extra batteries for both cameras
Memory card holder
DJI Osmo Pocket
Manfrotto handheld mini tripod
Small accessory bag for miscellany items
Laptop and iPhone chargers
ND filters and filter holder
Flashlight
Multi-tool accessory
There is also a top pocket which provides quick access to smaller items, such as a small mirrorless camera or even a small drone. Alternatively, you can use the interior space on the reverse of that top pocket for storage inside the bag, because you can compress/collapse that pocket. I generally just packed some of my accessories there on the inside.
Additionally, the two side external pockets work great for carrying a tripod (or water bottle, etc), so I attached my Peak Design travel tripod to it as well whenever I went out to hike and shoot. Tripod attachment straps are included of course.
And don’t forget the front zippered pocket which is great for an iPad or other slim items. It even came with a rain cover, a lens cloth and an air blaster - quite the nice package!
That’s a LOT of stuff for a small bag!
The great thing is that the bag is very comfortable when wearing it. It is well-padded and very light, and there is also an interesting build design that they call the Anti-Gravity System. It effectively bounces when you walk, relieving pressure on your shoulders. This allows the backpack to feel lighter than it is, and it seems like that is the case in my experience. I did not get tired shoulders even when carrying a lot of gear around. Trust me that you will appreciate this on a long hike! I did 9 miles and over 22,000 steps one day while wearing this bag, and my shoulders were just fine at the end of the day. That’s a win for sure!
But one of the best features in my opinion is that the bag is water-resistant. I’m not willing to dunk it in the river with my gear inside, but inevitably when out hiking you set your bag down and it gets dirty. Several times I would sit next to a stream and just splash water on the bag to clean the surface. Worked great and looks clean and new again! This is much better than with other bags made of some woven material, which basically get dirty and stay dirty. I cleaned this one quickly and safely! The water just beads up and rolls off it - perfect!
All in all it is a well-designed bag and I can tell a lot of thought went into crafting it. It’s durable, can carry a fair amount of gear, and yet doesn’t wear out your shoulders when walking around with it on. I enjoyed using it during my trip and definitely plan to use it on future trips too!
Thanks to Besnfoto for letting me test out the bag, and don’t hesitate to ask if you have any questions!
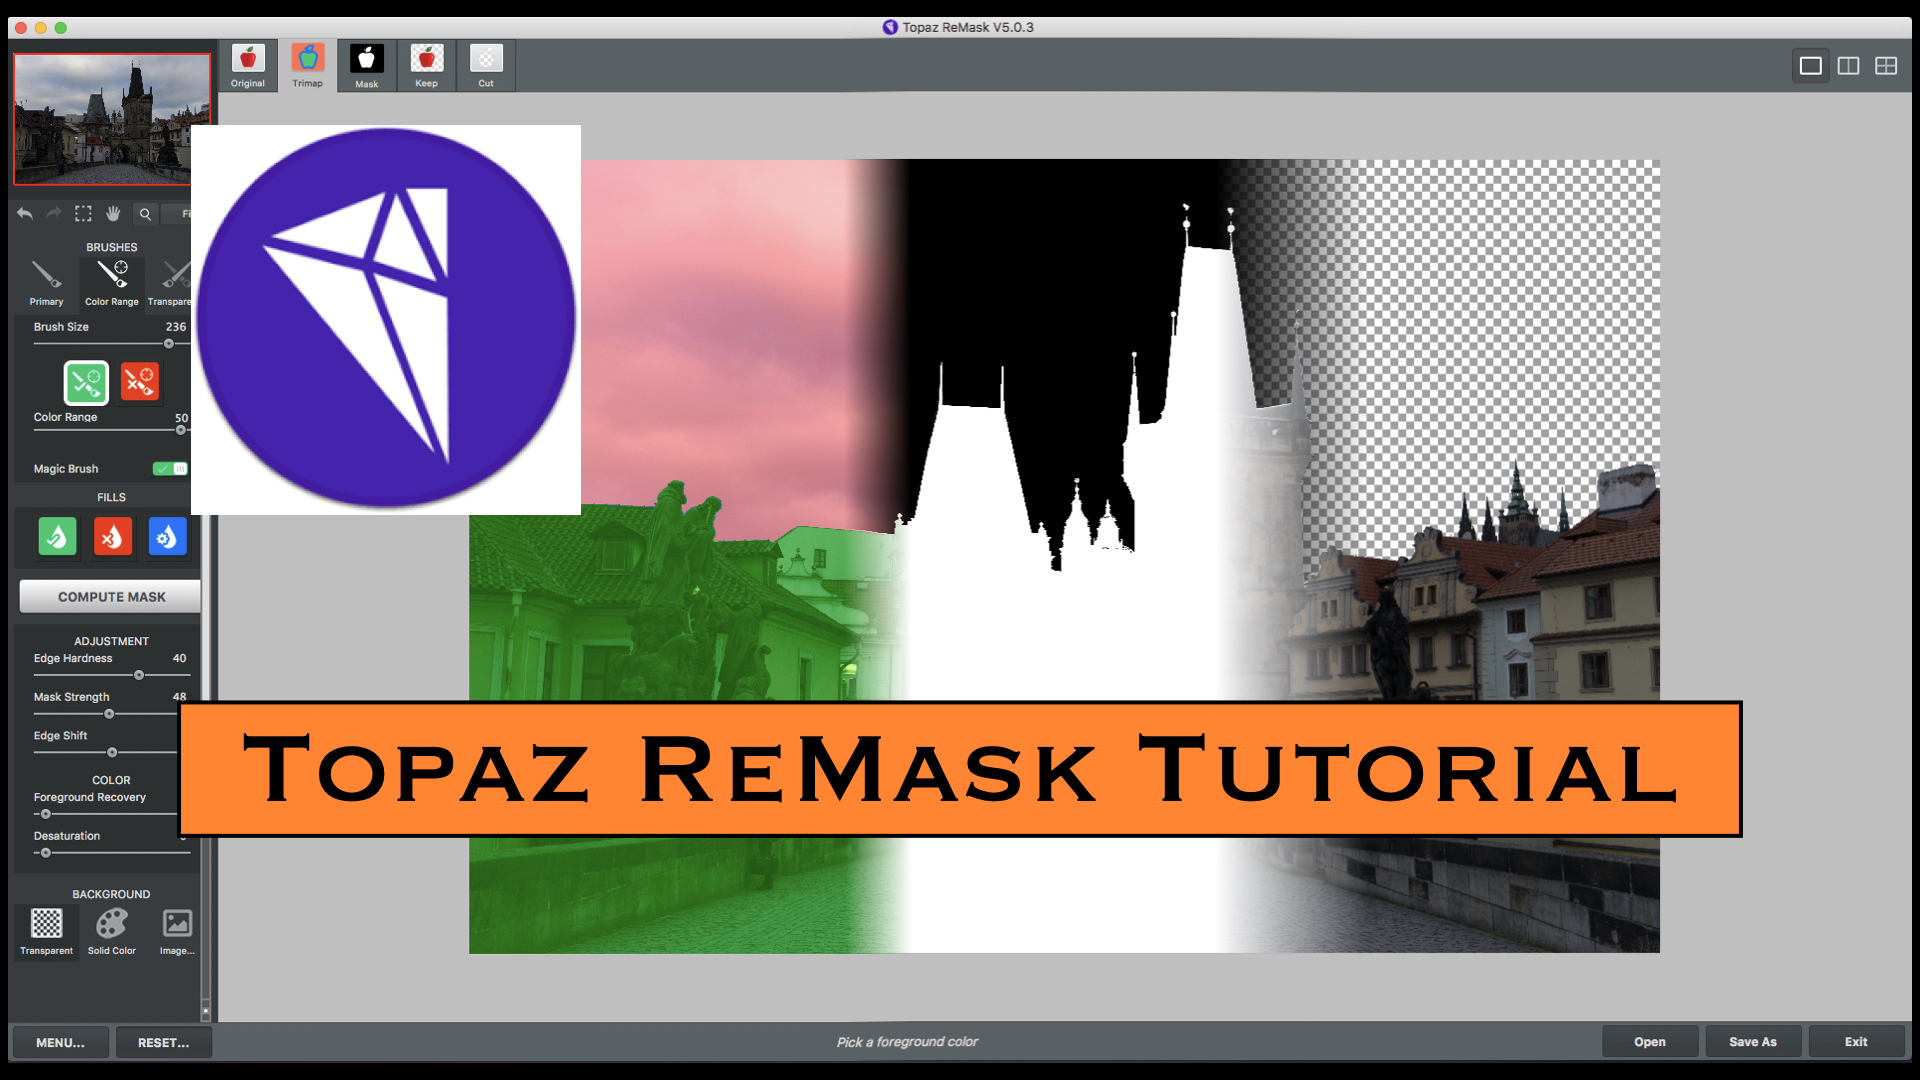
Getting Started with Topaz ReMask v5
Follow along as I demonstrate the precise masking power of Topaz ReMask v5!
Here’s a video tutorial for Topaz ReMask v5 which is simply amazing! It is really easy and intuitive to use, and you can quickly get a precise mask for replacing a sky in your photos. Enjoy!

Photolemur v3 First Look, Review and Preorders!
Photolemur v3 is now taking preorders, and it’s a cool little app. Check out my video review and let me know if you have any questions!
I like Photolemur, and the new v3 is now taking preorders! It's got some new features that are pretty interesting and cool, so follow along with the video and check it out for yourself!
You can get your pre-order here: https://bit.ly/2PSzvLU

Luminar vs Color Efex Pro: What's the Difference?
Luminar vs Color Efex Pro - here’s a video “showdown” wherein I compare the copious amounts of filters from each product and show you how each of these products works. Enjoy!
Here's a new "comparison tutorial" wherein I show you the pros and cons of both Color Efex Pro (part of the Nik Collection by DxO) and Luminar by Skylum. I used to really depend on Color Efex Pro for all of my color enhancements and adjustments, prior to Luminar coming on the scene. How does it stack up? What can you do in one that you cannot do in another? Well folks, check out the video and find out!

Analog Efex Pro 2 Review & Tutorial
A new video wherein I demo and review Analog Efex Pro 2 from the Nik Collection.
I really dig this plugin, so I did a video demo and review of it. Follow along and let me know if you have any questions!

Curious about Photolemur? Here's a video review.
Photolemur has gotten a lot of press about it’s AI photo enhancement. Here’s my video review of it!
Many of you have heard about Photolemur, the AI-driven photo enhancer that was recently purchased by Skylum Software (makers of my favorite apps Luminar and Aurora HDR). In this video I take 10 different types of photos and run them through it's AI engine to see what enhancements it provides to these shots. Take a look and enjoy!

How I Fell In Love With My Lensbaby Trio 28
How I fell in love with my new Lensbaby Trio 28 lens...a little story about the useless pursuit of perfection and how I have learned to embrace "good". Enjoy!
How I Fell In Love With My Lensbaby Trio 28
Late last year I had a birthday, and asked my wife for the Lensbaby Trio 28 as a gift. She’s not a photographer, so asking her to “figure out something cool” (and photography related, of course) for a birthday gift is like asking me to read something in Welsh. Who can figure that out on their own? I had to be specific, and specific I was.
So she got me exactly what I asked for - the Lensbaby Trio 28 - and I thought “cool, this will be a fun little thing to play with”. I had seen example photos on the Lensbaby website but other than that, knew very little of the lens itself other than it seemed to be “different”. I wanted to try it out, and the lens is fairly priced (read: not expensive) so I figured it wasn't too big a deal to get. I knew that if I didn't like it, at least it wasn't a pricey mistake. I didn't really have any expectations about it, other than it was something new to experiment with.
But I was way off! I had no idea I would come to absolutely adore this lens in such short order.
You see, I have spent most of my photography life seeking those “perfect” pictures. Now to be fair, I don’t claim to have ever actually achieved anything near perfection (plus, perfection doesn't exist anyways), but that was the goal (as misguided a notion as that is). What I mean by that is that I wanted to always have nailed the focus, see limited to no noise in the finished image, have the light be well-balanced and have everything be sharp, crisp and essentially lovely all the way around. You know, perfect. :-)
So over the years I have found myself shooting lots of HDR and doing copious edits in post production to achieve my vision for a shot. And I’m still doing all that with my non-Lensbaby shots, by the way - and plan to continue. I haven’t abandoned my ship, so to speak.
But this lens has definitely opened my eyes a bit wider and given me a different (and I would argue) better perspective on things. It has taught me to think differently about my photographs.
From the initial frame taken with my Lensbaby, I knew I was in for something completely opposite of what I had always aspired to. This is not about perfection - it’s about creativity and fun. It’s about something almost whimsical, yet still beautiful. It's not about the pursuit of perfection but rather the pursuit of the simple joy of taking photographs, flaws and all. I'm hooked. I love it.
Sure, we all want to take amazing photos, and sadly that leaves many of us (myself included) disappointed when things "don't go our way" when out shooting. Maybe the light was crap, or the weather was crap, or whatever. I have had many outings where I return with plenty of images, but none of them end up being "great" shots. They don't feel creative or interesting, but rather just a picture that I took of something I saw. You know, to put it bluntly, they lack feeling.
With this Lensbaby, it just feels different when you are taking pictures with it. I absolutely adore the look of these shots, and the bokeh is just gorgeous to my eyes. Especially at night in a city when all the lights are twinkling, this lens just helps create very compelling images.
It's caused me to think about ALL the photographs I am taking, either with the Lensbaby or without it. The pursuit of perfection is a terrible thing, frankly, and I'm done with it. Now that doesn't mean I am giving up on capturing awesome photos. In fact, quite the opposite. I think you have to have the mindset that you are out to capture an awesome photo. But my definition of an awesome photo is very different now (and this is a change that has been coming for a long time, it's just that the Lensbaby tipped me over the edge, so to speak). Awesome doesn't have to mean technically perfect, it just has to have a depth of feeling and communicate a message that is greater than just "I saw this and took a picture of it".
I just returned from a trip to London (and all of these images are from that trip), and brought along this lens “just in case”. I had a lengthy list of spots in that gorgeous city that I planned to photograph with all my usual tactics - tripod, cable release, brackets a-firing, tightly controlled composition and framing - the works.
And while I did all of those things - in fact, I attacked them with vigor - I also started putting on the Lensbaby afterwards for something a little less “controlled”. And you know what? I had so much fun with this little lens! Generally speaking, I was using it in late afternoon and on into the evening (in other words, in low light since sunset is close to 4pm in London in the winter).
I wasn’t expecting much, to be honest, since I was shooting at a fixed Aperture of f/3.5 (which is how the lens operates, and an aperture I would rarely use) and was moving the ISO up fairly high (at least high compared to my normal ISO 100 setting). Plus it’s a manual focus lens and that often requires some quick work and anticipation. Again, contrary to my usual “plan it out, set up on the tripod” sort of thing.
But with this lens on my Sony I feel creative and inspired right away. You can take a mildly interesting spot and turn it into something beautiful in a single click. The lights look great, the center focus is really sharp and the gradually increasing blur just works for me.
My favorite subject matter is cityscapes and street scenes (hence the visit to London) and using this lens on the streets of London was absolutely perfect. The 28mm focal length is ideal for this type of shooting (and I have been using the Sony 28mm f/2 for several years, and love it for this subject matter too). The lens has 3 different optics which give off 3 different effects: Twist, Velvet, and Sweet Spot (and you can read about them in the specs description here). I have found that I mostly stay on the setting for Sweet Spot - it gives a crisp center area of focus with lovely bokeh emanating outwards from there. It’s gorgeous, frankly. I love the look.
So I am now convinced this is exactly the creative burst I needed in my photography. While I will continue my normal shooting techniques, I foresee bringing my Lensbaby with me all the time for some fun, whimsical yet still beautiful shots. It’s great to find a new creative outlet in photography!
You can find all Lensbaby products on Amazon right here and on the Lensbaby site here.
Note: the above Amazon links are affiliate links. This means if you buy something there after clicking my link - not just this lens, but anything at all - I get a small commission. It's one of the ways that I support this site. Thanks!

Luminar 2018 Tutorial Series is live on YouTube!
My new Luminar 2018 Tutorial series is live on YouTube - here's Part 1. Check it out!
Hi there friends, as you know I am a big fan of Luminar and use it on most of my images. It's incredible, and the new 2018 version is really spectacular. I just started a tutorial series for it over on my YouTube channel, so I thought I would mention it here in case it's something you are interested in.
Here's the link to my YouTube channel: https://www.youtube.com/jimnix
Here's video #1 - and there are several more coming every couple of days or so. Enjoy!

Think Tank Photo Urban Approach backpack review
My review of the Think Tank Photo Urban Approach photo backpack - the best photo backpack I have ever had, by far. It's amazing! See what all I can cram into this thing! ;-)
The best photo backpack I have ever had!

Think Tank Photo makes incredible bags for photographers. I have used so many different bags over the years that I have literally lost count of them. I use them for a while, and then they either end up in a pile in my office closet where they are ignored and forgotten, or I sell them (assuming they are in fair enough shape), or give them away (nothing has been tossed in the trash yet). But I am keeping this one forever!
I own 2 Think Tank Photo bags right now, and had a 3rd one that I resold after a couple of years of use, for much the same price as what I bought it for. Yes, it was in great shape, and these things are built like a tank (though not nearly as heavy!). The only reason I sold that 3rd one is that I bought it years ago when I had a big, bulky Nikon DSLR and that bag, the StreetWalker Hard Drive, was just too big for my needs once I converted to mirrorless. It was like a single guy owning a 4000 square foot home. Just too much real estate.
So I went looking for a similar bag that would give me similar storage options, just in a smaller size. I found it in the Urban Approach 15 from Think Tank Photo. I also own their TurnStyle 20 sling bag - which is awesome too - but won’t be talking about that one here.
I bought the Urban Approach because I wanted something a little smaller than my previous backpack in terms of getting it under an airplane seat (I am a frequent traveler), but roomy enough inside for copious amounts of gear. After considerable research, I decided on the Urban Approach and I am very glad that I did!
Here is a list of everything I packed into it on my most recent lengthy (~4 weeks), overseas trip:
- Sony A7II mirrorless camera body
- Sony 16-35 wide angle lens
- Sony 24-70 midrange zoom lens
- Sony 28mm prime lens
- Sony battery charger
- Panasonic Lumix LX100 point and shoot travel camera (great for quick, random snaps)
- Panasonic battery charger
- Complete VU Filters kit - filter holder, lens attachment, case with glass filters in it
- Small bag of accessories - extra batteries, lens cleaning cloths, AC plug adaptors, etc
- Giotto rocket air blaster
- Think Tank Photo memory card holder
- Apple MacBook Pro 15” laptop
- Western Digital 4TB portable drive
- Chargers for both the laptop and my iPhone (my iPhone stays in my pocket, not in the bag)
- Small snacks for plane rides, vitamins, etc
- Eyeglasses case
- A paperback copy of Game of Thrones ;-)
THAT’S A LOT OF STUFF PEOPLE!
Additionally, I can easily attach my MeFOTO travel tripod when I head out shooting. The collapsed feet tuck into an external side pocket, and there is a small strap which buckles to the bag and wraps around the tripod. It works great. There is also another external pocket on the other side which can hold a water bottle.
Internally, there are two good sized pockets in which I can store small things that come into my possession along the way (trinkets or whatever). FYI these pockets are fairly flat, so they are not for bulky items. Lastly, there is also one more external pocket on the front of the bag, though it is pretty tight. I generally just drop coins in it - works perfect for that. I read online that some people were complaining about this pocket being too tight for their iPhone, but my iPhone is almost always on me so that’s not an issue for how I travel.
One other thing - in the compartment for the laptop, there is a secondary sleeve that will hold a 10” tablet such as my iPad Mini.
This bag is a dream come true for me. It holds everything I could possibly need (yes, it can get heavy when it’s full, but I don’t always take everything out each time) and still has plenty of space for growth. While I don’t consider myself a gear hog and don’t plan to acquire a lot of lenses, for example, I could still fit some stuff in the bag, especially if I am not carrying Game of Thrones around. That’s a 1000-pager folks! It’s pretty fat (but an enjoyable read).
Here are some other positives about this bag:
- Build quality is exceptional
- Adjustable internal compartments
- Zipper durability
- Padded back and shoulder straps
- Overlapping zippers for lock attachment
- Rain cover is included
- Internal dividers are well padded
- Slim profile for easy storage on an airplane or elsewhere
I can easily slide this bag under an airplane seat, even the aisle seats which often have a little slimmer space underneath for bags. Of course, it also fits in the overhead compartment, and on trains in Europe it’s easy to find a spot for it at your feet. It’s much less bulky than other bags I have used, but carries my mirrorless gear and other essentials without any issue.
I also like that the zippers meet at the top/front of the bag, so if I need quick access to something inside while I am on an airplane, I can just reach down and unzip it to get inside, because the lid just lifts up out of the way. Other backpacks often require me to pull them out a bit and stand them up to get at the internals, otherwise everything falls out. This is a little easier to me and a cleaner design. Plus, with all the little compartments (which you can adjust and resize) your gear does not move around at all. Everything stays in place, which is awesome!
Here are the physical specs on the bag, per the Think Tank Photo website:
- Interior Dimensions: 9.4” W x 16.3” H x 3.9-5.3” D (24 x 41.5 x 10-13.5 cm)
- Exterior Dimensions: 11” W x 18.3” H x 7.1” D (28 x 46.5 x 18 cm)
- Laptop Compartment: 10.2” W x 15.7” H x 1.2” D (26 x 40 x 3 cm)
- Tablet Pocket: 7.9” W x 9.8” H x 0.6” D (20 x 25 x 1.5 cm)
- Weight: 3.0 lbs (1.3 kg) With all accessories
Thus far all the photos are ones that I borrowed from the Think Tank Photo website, but I also thought you might like to see me prove my claims above about its carrying capacity. So here are some shots showing it loaded up with all the gear above, taken with my iPhone (since my cameras are in the photos).
Empty bag, and inside look at the compartments
Here's everything I am about to stuff into the bag!
Full of gear!
I laid the book on top and it still zips shut.
Conclusion - closing thoughts on this bag
In short, it’s the perfect backpack for me when I travel, since it can hold copious amounts of gear and yet not feel bulky or oversized.
I absolutely adore this bag. I glowingly give it two thumbs up! It's not cheap but these are very well made products that are well worth it!
You can get it on Amazon right here if you are interested. Thanks and let me know if you have any questions!
Disclosure: I use Amazon affiliate links when I discuss products, including in this review. If you click through and buy something - anything at all, not just the listed gear - I receive a small commission in return. The prices are EXACTLY THE SAME as when you visit Amazon directly, so this is a win for both of us. These small commissions allow me to continue to add additional content, provide free training and more, right here on the blog. Thanks for your support! Please let me know if you have any questions.

MPJ iPhone camera lens kit review
Today I delve into my love of iPhoneography with a review of a new lens kit for the iPhone. It's made by MPJ and includes a zoom lens, a fisheye, a wide angle and a macro - it's a lot of great stuff. Take a look and let me know if you have any questions!
I've been having a lot of fun with my iPhone lately!
I love to shoot with my iPhone. When I travel, I am constantly taking shots of this and that while I roam around, even as I stop and take shots with my “real camera”. There’s just something satisfying about taking a quick snap with the iPhone, making some adjustments in your app of choice, and sharing it with friends and family. So much fun. Plus, I find that I am shooting things a bit differently with the iPhone than I would otherwise. It’s a great creative outlet, and a great way to explore new techniques and compositions.
And since I do this quite a bit, I have accumulated a pretty large collection of iPhone shots on my Flickr page, where I keep them in this set, in case you would like to see them. While that is only a fraction of what I actually have taken, it’s a good example of what I am talking about here. And even though they get a lot of views, I’ve never really given any thought to them being anything other than just a quick mobile upload. It’s usually just something I saw and shared (although I tend to edit them first, normally in Snapseed).
Recently I was contacted by the people at MPJ regarding their camera lens kit for iPhone 6/6S. They found me on Flickr and asked me if I was willing to test out their camera lens kit on my iPhone and share my thoughts about it. I was clear that I would be honest about the product and in my thoughts about it, and they agreed. So, today’s post is a review of that product with a lot of sample images.
TLDR (Too Long, Didn’t Read) version: this is a nice kit, works exactly as advertised, and adds some extra fun elements to the already fun camera that is the iPhone. I’ve really enjoyed experimenting with this kit and I am glad that I now have it to experiment with!
For starters, it comes in a nice box. That might sound like a stupid or useless fact, but I really mean it. It was a nice box, and for a piece of kit that sells for about $40 on Amazon, I didn’t expect that. You know what they say about first impressions. This started off well.
The kit includes a number of lenses and more, so here is a complete list:
- telephoto lens with manual focus
- fish eye lens
- macro lens
- wide angle lens
- universal holder
- hard plastic case for iPhone 6/6S (which is required to use because lenses attach to it)
- mini tripod
- velvet bag
- lens caps
- cleansing cloth
- instruction manual
I find that long of a list to be impressive considering the cost. It’s a great value. And altogether, I suspect this stuff adds up to about 1 pound of weight, roughly. It’s all pretty small and light. You can easily carry it with you in another photo bag, or if you carry a purse or backpack it would take up limited space. I actually stuff it all in a tiny zippered bag that I put in my larger photo backpack. Small and light, so it’s easy to travel with. When I get somewhere and want some iPhone shots, it’s a quick job to attach whichever lens I want and start shooting.
Additionally, everything feels like it is really well made. It’s all very solid and sturdy feeling. I don’t worry at all about the quality here - it is evident immediately.
Of course, my interest lies more in how well it performs in the field. While iPhone images aren’t the backbone of my photography work, they are quite fun and I want to make sure they are something I like and am proud enough to share - and I hope that I continue to use my iPhone for imaging for years to come.
To summarize, these lenses all performed well for me and I enjoyed each of them for different reasons, though I admit I like some better than others. Let’s examine them all individually (and I have included sample images for informational purposes).
The telephoto lens - 12x zoom is farther than you think!
This is by far the largest of the lenses, which makes sense. It gives you some pretty serious reach, photographically speaking, and adds the ability to manually focus (which also makes sense). It provides 12x magnification from the standard iPhone view. I’m not sure if 12x sounds like much, but when you attach it and see how much further you can see through it, it’s pretty amazing.
It’s just over 3 inches long, and you screw it onto the hard plastic iPhone case. The area on the iPhone case where it attaches (right in front of the iPhone camera, of course) is threaded and the lens just screws into it. Easy.
Once you put it on and open up the camera, you will immediately see how much zoom this lens has. To be clear, it is a fixed focal length lens so you cannot zoom in and out with it. But it does cover a great distance, so anytime you want to see something way off in the distance, this is a great option.
This lens is the reason for the mini tripod that is included. While I like the little tripod, it’s just that - little. It’s basically a tabletop tripod with extendible legs - fully extended it is less than a foot tall. It is great if you take product shots at home or something like that, but I tend to take travel images, so this wasn’t super useful to me.
Being out in the field, I rarely have a good place to set this mini tripod, so it ended up on the ground. But down there I find it hard to get in a position where I can clearly make out what the camera is displaying. Thus, I haven’t used it a lot, though I can say that it holds the iPhone steady, which is the point.
The telephoto lens works exactly as you would expect, and with the manual focus it’s easy to focus on whatever subject you have chosen. Personally, this was my least favorite lens of the bunch. To be clear, it works great and the reach is incredible - I just found that I enjoyed the other ones better. That’s likely due to the creativity the others inspired in me and in no way is a reflection on the quality of this lens.
A shot of the Austin skyline, with no lens attached
The skyline again, with no lens attached
A closeup of the Frost Bank Building in downtown Austin, shot from the same spot as the photo on the left
A railroad track crossing the river in Austin, shot from the same spot as the photo on the left
The fisheye lens - talk about a fun lens!
As the name implies (and just like other fisheye lenses), this one gives you a very interesting rounded view of things (a 180 degree view) and is actually my favorite lens of the group (almost rivaled by the macro lens). It’s very experimental and fun to attach the fisheye and just fire away. There is a strong vignette on the image, but it’s fun and that isn’t a bother to me at all. It’s just part of the art of the fisheye effect.
The lens is about the size of a quarter, at least in diameter, and less than 1 inch tall. Small, light, easy to travel with, and fun. You could easily just carry this in your pocket, either attached to the plastic case they provide, or just loose in your pocket. And to be clear, it just screws onto the hard plastic case the same as the zoom lens does.
On a couple of recent outings, I found myself using this lens more than any other. Once I attached it, I found it hard to remove. Not physically - it just unscrews quite easily. I mean that it was just so fun that I didn’t want to remove it!
Perhaps I am in a honeymoon phase or something, but I just really got into the fun of using a fisheye and the creative compositions you can conjure up when using one. I really feel like this is the lens I will use the most, though they all have their merits.
The macro lens - get in real close!
I thought that the macro lens was done in an interesting way. Instead of screwing it onto the case like the zoom and fisheye lenses, it is mounted on a clip bracket that you attach to the case. You just line up the lens with the camera eye, clip it to the plastic iPhone case, and presto! You have a macro lens.
I wasn’t sure how well this was going to work until I tried it, but it does work well. Of course you have to make sure it is lined up properly, but that is simple. FYI that the focusing distance is incredibly close. It took me a bit to figure that out, because everything looked blurry - because I wasn’t close enough.
Once I got in closer it all worked great. This is a pretty fun lens too, because there are a million things you can shoot in macro that you would normally never pay attention to. Again, a nice creative boost to your iPhone photography. It’s quite fun, and also small enough to carry around in your pocket.
I find myself looking much closer at things now and experimenting with this macro lens. I would say this one is my #2 out of the 4 lenses in this kit. Again, it’s very different and allows for interesting views of things, so I think that’s what attracts me to it.
The wide angle lens
This one gave me fits for a while, but not because the lens didn’t work. It works great. My issue was that I kept trying to attach it to the hard iPhone case, just like I did with the zoom lens. It wouldn’t fit, so I assumed I was doing something wrong, though of course I didn’t know what it was.
Finally, I got onto Amazon and read about the product, and found out that the wide angle lens actually screws onto the front of the macro lens, and once screwed on there you just clip it to the hard iPhone case like you did for the macro lens. That’s my one “complaint” (in quotes since it’s not a product issue) - I saw no documentation anywhere that explained how you connect the wide angle. Then again, it wasn’t too hard to figure out after a little online research.
One more thing about attaching the wide angle. When you screw it onto the macro lens clip, note that it screws in counter-clockwise (to the left). Perhaps that is standard in other cultures, but in the US we screw things in clockwise (to the right - hence the expression lefty-loosey, righty-tighty - just a silly American expression). Oddly, the zoom lens screws in clockwise so that was my expectation for this one too, since that is the “normal” way to do it for me. That was another reason why I couldn’t figure out where it attaches, and I did not find anything about this in the documentation. Anyways, it’s all solved now and everything works fine, and I am out shooting and having fun with this kit.
Summary
I have really enjoyed this kit and it has sparked some creative stuff for me with my iPhone photography. I am mostly using the fisheye and the macro, so I find myself leaving home with the hard plastic case on my iPhone and the fisheye, macro and wide angle in my pocket. That way if I see something interesting, I can just grab a lens from my pocket, quickly attach it, and I am off and creating something interesting.
In summary, I find this kit to be made in a high quality manner out of sturdy materials. The lenses perform well, especially considering how small the entire kit is, and they offer up some great creative possibilities that extend the usefulness of your iPhone camera. You can easily take them along when traveling and find new ways to shoot with your iPhone, and capture things you could never capture before. I will continue to use this product and definitely think it is worth the $40 if you want some new options for your iPhoneography!
Full disclosure: I received this kit at no charge, as MPJ asked me to review it and share my thoughts. Apart from the kit, I did not receive any compensation for this review, and this is not a sponsored post (that is, they did not pay me to write this - I am sharing my experiences with it in exchange for the product). All thoughts on the product are my own, based on my experiences with it thus far. I made it clear to MPJ prior to accepting the product that I would be in honest in my review, and they agreed. Please let me know if you have any questions.
If you are interested in this product, you can find it on Amazon here. It sells for about $40.
Have fun out there shooting!

First impressions: Aurora HDR Pro
Today I share some insight into Aurora HDR Pro - a new product I am using to create my HDR photos with (and my single exposures too). It's incredibly versatile and powerful, and I am having a great time with it. Read my quick review, see some screenshots and finished photos, and let me know if you have any questions!
I've just spent the last few days immersed in Macphun's Aurora HDR Pro (co-designed with world-renowned photographer and all-around nice guy Trey Ratcliff) - and I'm incredibly impressed!
Like everyone else, I saw the news of this new software come across my social feeds a while back when it was announced. It sounded interesting, but honestly, I thought I was going to pass. The truth is, I have PLENTY of software tools already, and I couldn't imagine that I would need or want to add to my arsenal. You see, I don't even use everything I have.
If anything, I would rather pare down the amount of software I have. I already have more stuff than I really need, and certainly more than I use on a frequent basis. I've actually been giving some serious thought to completely dropping a few things (and I mean a full-on delete from the Mac sort of drop) - I just wasn't sure what it was going to be. Well, I'm quite a few steps closer to figuring that out now!
After hours spent using Aurora HDR Pro over the last few days and editing a bunch of photos, I actually do think I can pare down the software I have - because Aurora HDR Pro can replace nearly all of it!
You see, I am a simpleton in many ways when it comes to photography and post-processing my images. That's probably not something most photographers would admit, but it's true in my case. I like things to be simple. I want things to be easy and straightforward, and I don't want to read a book or two in order to figure out how to use something.
Plus, I don't want to spend hours on a single photo - that feels like a total waste of time for me, and when I see photographers brag about doing so, I don't understand it. It's impressive in a technical sense of course, but I'm not interested in that sort of thing. I've never used Photoshop in any serious manner, as I always found it clunky and difficult (and truthfully, a little intimidating). But, I liked the idea of layers and so I always told myself it was something that I needed to get a better understanding of.
Recently, I reconnected with the fine folks at Macphun about their Affiliate Program. You see, I signed up as an affiliate there a couple of years back, and started using their excellent product Intensify Pro (now known as Intensify CK, part of their Creative Kit - and I need to make some updates to that review, but it's still 99% accurate). I loved the product (as you can tell by the review) but for some reason I got distracted with other things and sort of fell out of their orbit as they changed their program. Turns out, I wasn't in their program anymore, and didn't even know it. Shame on me.
Thankfully, I am back in the program and since this is their fresh, new product, I decided to dive in and see what the fuss is all about. Well, I am glad that I did.
This product is ABSOLUTELY FABULOUS and I can see that it is going to replace several products that I have used a bunch in the past, but don't get as much use from today. In my opinion, some of those other products haven't kept up with the advances that are so evident in Aurora HDR Pro (and no, I will not name those products) and thus they seem to keep falling behind. That has prompted me to try and consolidate my portfolio of products - and now I feel like I can do so.
In case you are a pinner, here's a handy Pinterest graphic for you.
In short, you can do SO MUCH with Aurora HDR Pro that it's impossible to describe it all in this (relatively) short blog post. While this isn't a tutorial (though I plan to create one), I will show you a few photos that I edited with Aurora HDR Pro and a couple of screenshots too.
But first, here are some key features that I love about this product:
The tone mapping algorithm is excellent - I am loving the results that I get.
The presets are great! While I tend to prefer to alter any preset, I have found several that I like "as is".
Layers!! This is probably the most powerful aspect of Aurora HDR Pro. You can create layers and just mask in edits to portions of a photo. For example, you can create a mask for the sky and then apply noise reduction and smoothing just to that area - so easy!
The clarity and detail controls are excellent.
This is a great editor for single exposures too! In other words, you don't even have to care about HDR to get HUGE benefits from using Aurora HDR Pro. I'm using it on a LOT of single exposures.
So, time to get onto some photos, right?
I was in Scotland late last year, and came home with a bunch of photos that I have been getting to slowly. So I thought that for this post today, I would jump in and edit a few of them with Aurora HDR Pro. I was in Aberdeen and took a day to head out to the little coastal town of Stonehaven, primarily because I wanted to visit Dunnottar Castle (which like all castles is awesome). But before I got to the castle (which I hiked to from the town), I passed by this little harbor area. I loved the look of it, and stopped to fire off a set of brackets. This photo below is the middle exposure, straight out of the camera with absolutely no adjustments done to it yet. It's a little too dark and certainly lacks any pop. But, I like the scene, so I figured I could get something useful out of it if I spent a little time on it. And obviously, it didn't look this flat in person.
Stonehaven, Scotland - straight out of camera, before I make my adjustments
I took that single exposure above and, from Lightroom (which I use as my library manager), went over to Aurora HDR Pro to see about messing around with it. This was my very first photo that I adjusted in Aurora HDR Pro, even before I had watched any of the excellent videos on the Aurora website. I was just trying to apply some presets and make a few minor adjustments. No masking, no brush work, just a single preset with some minor adjustments to that preset. I liked it so much that I kept it! Plus, this was about 10 minutes worth of work, in total. Not a bad first effort in my opinion, considering I was sort of flying blind. Way more pop in this one, much brighter, better colors and contrast - it's much improved!
A single exposure after applying one preset and making a few minor tweaks to the sliders
Next, I watched some of those videos so I could get a better handle on how to use masking and brushes, etc. Most of the videos are pretty short, and the tools are VERY EASY to use. In no time at all, I was stacking layers and brushing in stuff here and there with the use of masks. Easy and quick!
Next I took the below photo (again, a single exposure straight out of camera with no adjustments applied yet) and went over to Aurora HDR Pro for another test run. Once again, I used a preset and made a few minor adjustments, and the second photo below was the result. Simple and a worthy result. Here's the base photo before any adjustments:
Single exposure with no adjustments yet made to it
And here is the result of about 5-7 minutes in Aurora HDR Pro (which was mostly spent trying different presets and moving a few sliders left and right):
Here I applied a single preset and made a few minor tweaks to the sliders
I like that result, but it was pretty basic, all things considered. So I decided to try again but with a couple of new tricks I picked up in their videos.
This last photo was created with the use of a couple of layers applied. I separately warmed up the sky and made some color shifts in the ground, causing the yellow grass to pop a little more.
Down below is a screenshot from the editing of that last photo. In the upper right you can see the different layers I have created to make the selective edits to this photo (Ground, Sky, Sky DeNoise). I name them based on the edits I plan for that layer to make it easier to keep them straight (especially helpful after I have moved on to something else on the photo). Plus, if you want to change something, you just click on that layer and go back and edit it further (and I find myself doing that a lot, because I may want to alter previous changes based on subsequent changes I added to the photo).
Also, here's a great feature of the masks - you can just copy and paste a mask to a new layer if you want to . For example, I created a mask for the Sky layer that, as the name implies, covers the whole sky. While working on that layer, I made some color adjustments to warm it up a bit. Next, I wanted to take some of the noise out of the sky, so I just copied the mask from the Sky layer and pasted it onto a new layer that I called Sky DeNoise. So easy, and it keeps you from having to re-mask everything when you decide to make multiple edits to a single area. I love that!
And one other thing - after you copy a mask like I just mentioned above, you could actually invert it too if you just wanted to mask the rest of the image. That's another time saver and a great feature.
This next photo was the next scene I encountered after walking past and photographing that monument from the last shot above. It was the first good view of Dunnottar Castle that I had as I approached it. I love the dramatic setting there - so awesome! However, the photos straight out of camera were pretty flat. This time, I decided to create a full-on HDR by merging all three frames. So in Lightroom I highlighted the ones I wanted to merge, and headed over to Aurora HDR Pro for some fun.
Here's the screenshot which shows the photo after I have applied some adjustments (a preset with some minor tweaks, and then a layer to DeNoise the sky). I was able to get the colors and textures to pop quite a bit more, which is the look that I wanted for this photograph. Quick and easy - done in way less than 10 minutes.
Here's the final photo, after I took it back into Lightroom and straightened that crooked horizon. :-)
In summary, the power of Aurora HDR Pro is vast and I have to say that I will be using it on just about everything now. I love it, and this is more than just some "ooh, a new toy" kind of reaction. It's incredibly powerful and allows me to get rid of many other products that I either don't use, or don't like to depend on (or that have fallen behind).
It gives me the power to create HDRs and make fine-tuned adjustments in the same product. It allows me to take a single exposure and edit it with this powerful software, so you don't even have to merge multiple photos (or take them, for that matter, if you are so inclined) if you have a single exposure that's usable.
I can make every adjustment that I can think of in this one product: layers and masks, color adjustments, graduated filters, brushes for fine-tuned adjustments, details, clarity, structure - the list goes on! You can even do luminosity masking and custom textures. It's crazy!
I wouldn't have believed it prior to using it, but Aurora HDR Pro not only crams all this awesomeness in a single product, but it does so in a way that is not intimidating, overwhelming, or even crowded. It just all fits in there and works great. I highly recommend this product and as soon as I can find the time, I will be sharing more about how I use it and some tips and tricks I pick up along the way! And I will be editing a LOT more photos with it too!
Oh yeah, I also have an announcement to make
Here's some news - I started a YouTube channel! It's something I've been thinking about for a long time, and finally found the time to get the right equipment and teach myself how to do it. So I figured that starting out with a review of Aurora HDR Pro would be the perfect start - so, here it is! Enjoy! I plan to do more videos, and share a lot of workflow stuff, processing tips, and more. It will be fun! Click through to subscribe to my channel if you are interested! You can find me here:
**************************************************************************************************************
FULL DISCLOSURE: As an affiliate of Macphun, I received this software for free. However, all opinions expressed here are my own, and are not dependent upon my relationship with Macphun. This is not an ad for Macphun and they did not compensate me to publish this mini review. I wrote this because I like to share my experiences with products, and I simply love the software. When you consider what all it can do (and what all it can replace), I feel it's a great value for $99.
If you are interested in purchasing Aurora HDR Pro, you can use the discount code JimNix and get 10% off your order. Just click the banner below to be directed to their website. If you use that link to purchase the software, I earn a small commission which I reinvest in the growth of this website. Thank you for your support.
Please let me know if you have any questions and have fun with it!

First impressions of Topaz Glow
Well, my friends at Topaz Labs have done it again. This time, it's called Topaz Glow and it's a brand new product that gives you all sorts of creative effects for your images. Check out my images and FYI that it is on sale for an introductory price of just $49.99 through the end of this month!
Topaz Glow - the newest product from Topaz Labs!
As you have heard me say before, I am a big fan of the products from Topaz Labs. I use them a lot, and I enjoy them. They are easy to use and they work great. I also like that they continually come up with new and exciting products that are a lot of fun.
One of their first products for artistic work that I used was Simplify, and I still love it. Then they came out with Impression, which just blew me away. I share a lot of photos here that I created with Impression.
Well now they have done it again - this time, it’s called Topaz Glow!
To be fair, this is not your normal post-processing product. This one definitely sits on the edgy side of being artistic, but it’s a lot of fun. You can do a lot of exciting and interesting things to your images with Topaz Glow. It really gets my brain moving in all sorts of creative ways.

To quote their press kit directly: “Containing more than 70 unconventional and quirky filters, with Glow you can alter your images using neon, graphic, liquid and other electrifying effects.”
I was trying to come up with some inventive way of describing the product, but I can’t say it any better than that. I guess I have no future in marketing. :-)
And like their other recent products, it acts as a stand-alone or as a plug-in. I like that.
Get it while it’s on sale!
Topaz is offering Glow, from Dec 9 to Dec 31, for an introductory price of just $49.99 (instead of the normal price of $69.99). That’s a great deal. Just use the coupon code INTROGLOW at checkout to get the savings!
Click here to go to the Topaz Labs site and see more about Topaz Glow!
Note: the above link is an affiliate link, and if you use it I receive a small commission which I invest in this site, and which keeps the lights on here. Thank you very much!
And hey, here’s some sample images. Check them out! I will put a full review together as soon as I can and share it with you all when it’s ready!
A street corner in brussels, belgium at sunrise
chateau de chenonceau in the loire valley of france
broadway avenue in nashville, TN during blue hour one evening
a lake outside of red river, new mexico
the famous port of nyhavn in copenhagen, denmark
in the jardin du luxembourg in paris, france