
Free Landscape Presets for Luminar Neo
Want some free Luminar Neo presets, designed specifically for landscapes? Click to find out how to get them!
Would You Like Free Presets for Luminar Neo?
I have just created a new, free preset pack in Luminar Neo, crafted specifically for landscape images.
I love shooting landscapes, and I love editing landscapes. Both are super enjoyable to me. I’m assuming that every photographer loves to take photos, but I have heard lots of folks mention that they don’t really enjoy the editing part. I love to edit photos. It’s super relaxing and fun for me. But, to each his/her own, of course.
One thing though that can help you get an edit done more efficiently is to use a preset. It’s just a pre-organized collection of filters, all bundled up into a one-click solution. To be fair, I recommend using a preset as a starting point on your edit, simply because a preset can’t possibly look perfect on every image. It always needs some customization. But, using one can jumpstart your creative flow, or get you close to your final edit in a single click.
I’ve been busy making these presets for a while, and I was actually planning a whole bundle around landscapes, but I am going to postpone that for now. I have a lot of things that I am working on, and need to focus my time and attention on those items.
Part of that bundle was going to be this preset pack. I could add this to my store and charge for it, but as a token of my appreciation, I am offering it up for free instead. I love this community, and love to give back, and since you all do so much for me - well, I wanted to do something for you, too.
Sound good? Ok, great. :-)
The only thing you have to do to get this preset pack is to subscribe to my newsletter. And by the way, when you subscribe, you get access to several other free things too: an additional Luminar Neo preset pack, a couple of short ebooks, some free overlays (skies and textures), and even some LUTs.
It’s basically a bunch of free creative assets to help you make better looking photos. Subscribe below and get started making beautiful photos!

Presets vs LUTs in Luminar Neo
Today’s tutorial compares presets and LUTs in Luminar Neo. I cover the pros and cons of each, what the major differences are between them, and discuss and demonstrate when, why and how I use them in my editing. Enjoy!
I’ve recently gotten several questions about presets and LUTs, mostly about trying to understand the difference between these two tools. So as I tend to do, I made a video about it. I also created a chart that shows all the differences, and you can download a copy of it if you join my newsletter (plus you get some Luminar presets and more - all for FREE!).
https://jimnix.com/newsletter
Both tools are excellent, although I feel they are built for different uses. I use both in my editing at times - sometimes it is one or the other, and sometimes I use both on a single image. It just depends on the look I am trying to achieve.
Check out today’s tutorial video and let me know if you have any questions!
Master Luminar by Going Deep with Presets
Using presets is the best way to get familiar with Luminar. Follow along in this video as I show you how I did it!
Here's a recent training video on Luminar, for your enjoyment! :-)
I do love to create and share these videos - it's always fun for me and I inevitably learn something along the way. In this video, I share some tips for how I came to be really comfortable with Luminar. I started with presets and then built my understanding from there. It's a simple yet effective approach that you can use to quickly get up to speed on this amazing software. Give it a go and let me know your thoughts - and thanks!

Announcing London Calling, a preset pack for Luminar!
Announcing London Calling, my newest preset pack for Luminar! Check it out!
A gorgeous collection of presets for enhancing your Luminar experience! Here are 27 new presets inspired by my recent trip to London!
Hello friends, I am back with another preset pack for Luminar! You can find my other preset packs right here if you would like to see them all.
This is the first Luminar preset pack I've created for sale in over a year - lots of cool stuff in here!

Don’t have Luminar yet? Shame on you. ;-) You can click on the banner below to buy it from the Macphun website. Trust me when I tell you that you will love it. You can also download a free trial at their site if you want to test drive it first. You can do SO MUCH with Luminar that it will blow you away. It has completely changed my photo editing, making it faster and better!

Some quick thoughts...
I spend nearly all my time in Luminar now. While my photos are managed in Lightroom, I take them into Luminar for the majority of my edits. I find Luminar to be more powerful and capable than Lightroom, with more filters to experiment with, too. Even with my HDR photos, I will build them in Aurora HDR and then take them to Luminar for stylizing.
I LOVE to create these preset packs. It’s not just fun for me, but educational as well. It makes me really dig into the product deeper and forces me to get out of my habitual edits to craft something new and interesting. I also use my presets ALL THE TIME. Sure, I create them and sell them here, but I also use them on all my images. I love them, or else I would not put them out there. I hope you feel the same!
I think of presets as the “easy button” for photo editing. Sometimes it really just takes that one click to get your shot looking exactly how you imagined it, although of course there are times when a preset is a great starting point to send you off in a new creative direction. Either way, I know you will enjoy this new preset pack and get a lot of mileage out of it.
Introducing London Calling, a preset pack for Luminar
I absolutely adore the city of London. It’s long been one of my favorite places. It has so much history and beautiful places to shoot, and even when it’s raining the city just sparkles with a beauty that draws me in. The city inspires me at every turn.
Upon returning from my recent visit there, I spent hours and hours editing photos and creating these presets. I have tried these presets on all sorts of photos - landscapes, cityscapes and more. They are very flexible and fun, and I have been using them on many of my recent images that I share. I’m proud of this preset pack and I hope you enjoy it as much as I have. There is a lot of variety in this pack, just as there is a lot of variety in London.
Assuming you have seen some of my work, then you know that I like bold, colorful and expressive photos. These presets are designed as big moves, and not just barely-noticeable minor adjustments. Big moves are good. Minor changes are a waste of time.
Don't forget you can stack presets for more fun and experimentation! I often stack 2 presets and adjust the opacity levels of each layer to get interesting and beautiful results. Or stack them and just mask in the part of the preset that fits with your photo. Your options are limitless! Just experiment and have fun. That's what this is all about, anyway. Create something interesting and have fun doing it.
There are 27 presets in this pack and once loaded in Luminar it will be displayed as it’s own category of presets, right alongside all the other categories that are built into Luminar (see below for installation instructions).
I even recorded a video showing many of the presets in action. Take a look!
Thanks for stopping by, and let me know if you have any questions. I appreciate the support very much! I couldn't do this without your support, so I want you to know I am deeply grateful. Thank you!
How To Install A Custom Preset Pack
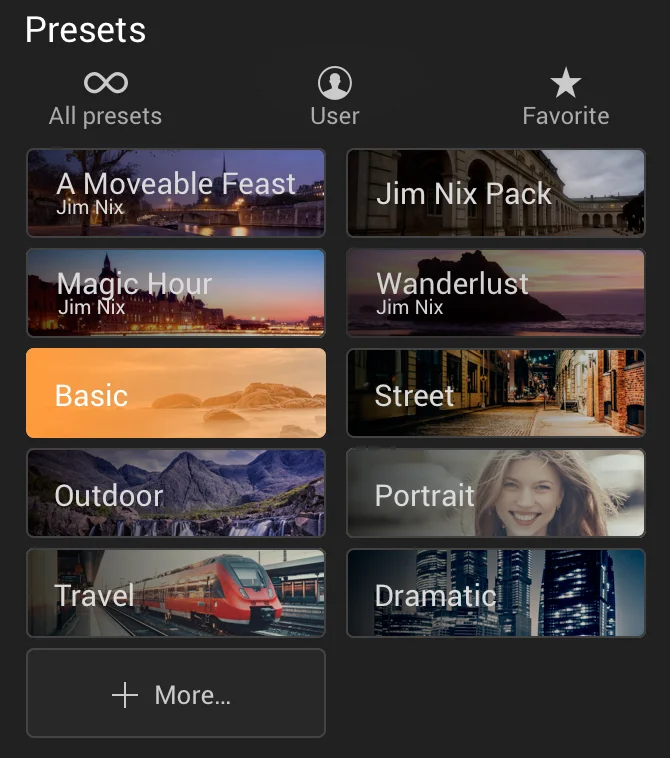
When you import a custom preset pack such as this one, it will create a new category in the Presets category window, and the presets will be displayed within that category.
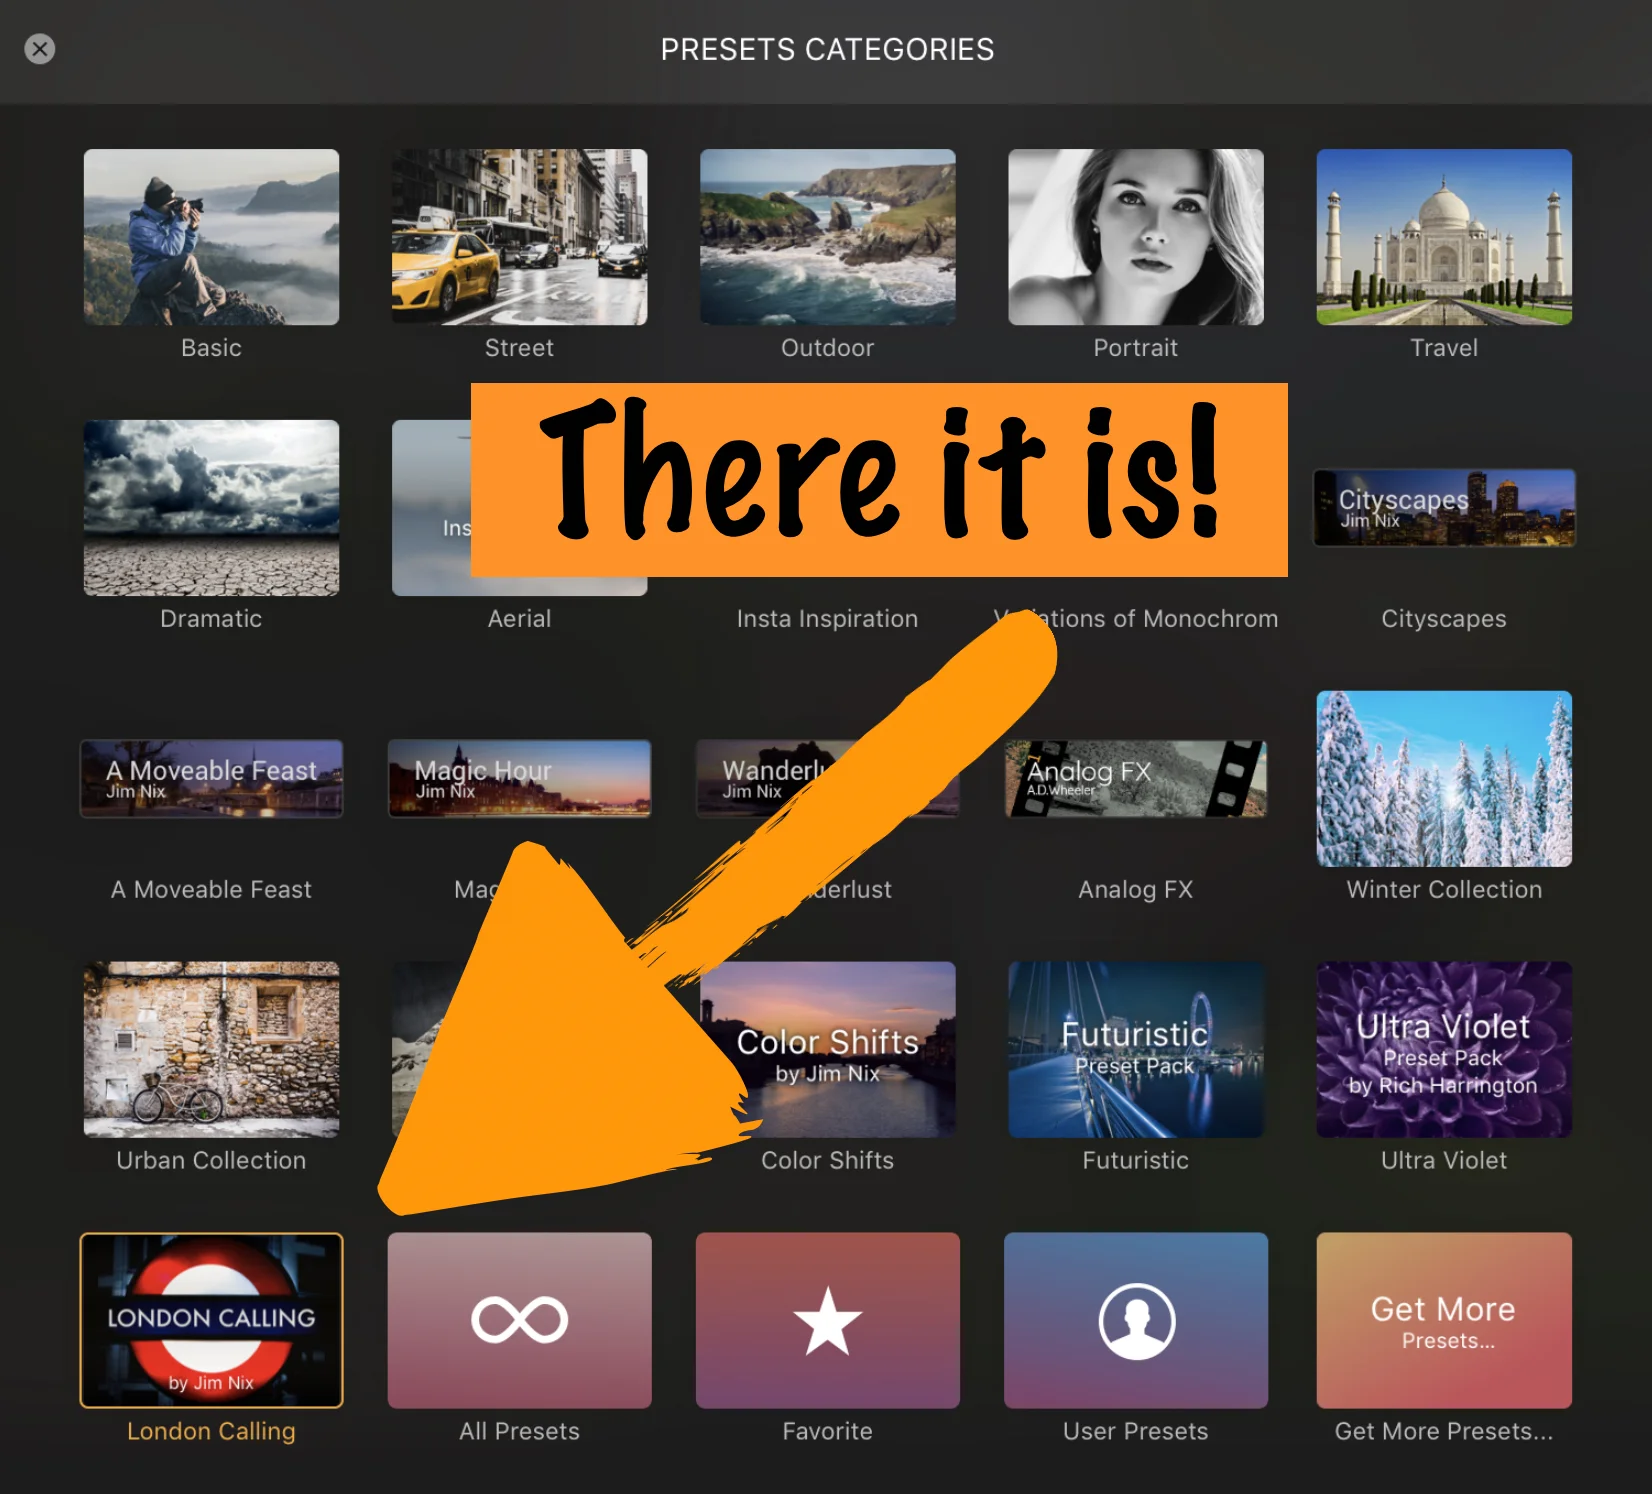
See the example to the right. -->
To add a custom preset pack, select the menu item File > Add Custom Presets Pack. An open dialog box will be displayed, allowing you to choose the pack you wish to add.
After you receive your email with the download link, download the preset pack file to your desktop and that allows you to easily find it and select it.
Then you start making awesome photos!
Show me some samples, Jim!
Ok, it’s about time to do that, don’t you think? Take a look at all the screenshots below and any of them can be viewed larger with a single click. I included the split screen Before/After view so you can see the impact each preset has on an image. You will also see the preset name in the screenshots below. Many of these are the same as shown in the video above, in case you didn't watch that. Enjoy!
Thanks for taking a look and let me know if you have any questions!


Introducing "Color Shifts", a Free Preset Pack for Luminar!
How about some free presets for Luminar? Ok, here you go!
16 FREE PRESETS FOR LUMINAR - CHANGE COLORS WITH ONE CLICK!
It's no secret that I love color. It's also no secret that I love to manipulate colors in my images. So it was only a matter of time before I started making presets for this stuff.
I am constantly changing up colors in my images, for artistic or aesthetic purposes. Sometimes I will even take edited images and go apply some new color "looks" to them for fun and experimentation. It's part of how I spend my free time (yes, I am a bit geeky about this stuff).
So I decided to make some presets with a lot of different color looks built into them, and here they are! And yes they are free! Go download a copy for yourself!
Note: I will admit that these presets are a little weird. This isn't your traditional "bump up the saturation" sort of thing. These are just...different. However, they are free so if you don't like them, well you can't complain about the price! :-)
And if you want to see this in action, below is the intro video I did about this preset pack:
Get Your Free Preset Pack Here!
CLICK HERE TO DOWNLOAD THIS FREE PRESET PACK
(Note: click on the green button towards the top right that says DOWNLOAD)
This link will take you to a hosting site I have used for years, called MediaFire. The file is called Color Shifts.mplumpack. Download and then you can drag it onto Luminar to install it, or if you are in Luminar already, click on File>Add Custom Presets Pack and chose the file to install it.
SUPPORT THIS SITE
Yes this is a free preset pack and you are welcome to use it, share with your friends, and all that. I don't ask anything in return other than to have fun with it and spread the word about my work if you can. I always appreciate that.
However, if you enjoy all the free videos and presets and are interested in making a donation, I gladly accept them! I spend countless hours creating new things to share each week and if you are interested in supporting this work, that's great.
You can simply click this link https://www.paypal.me/jimnix and make a donation of your choice. Whether you do or not, enjoy the training and the presets! More coming every week! Thank you!

Moving Presets and Workspaces from Luminar 2017 to Luminar 2018
Did you upgrade to Luminar 2018 yet? Are you interested in moving your presets and workspaces from Luminar 2017 over to the new version? You can do that quickly and easily. Here's how.
Hi everyone - I received the same question so many times right after the Luminar 2018 launch that I found it much easier to just make a quick video about it.
It seems many people were not clear how to move presets and workspaces from the old version to the new. Truthfully, it's quick and easy. Here's a short video showing how. Enjoy!

Announcing "Roadtripper", a preset pack for Aurora HDR 2018!
My newest preset pack is ready! It's called Roadtripper, and it's for Aurora HDR 2018. Check it out!
Roadtripper: a preset pack for Aurora HDR 2018!
Hello friends, today I am announcing my first preset pack for Aurora HDR 2018. I have been working with this wonderful product for a while now, and have hand-crafted these presets to help you get the most out of your Aurora HDR 2018 experience. You can do SO MUCH with Aurora HDR 2018 that it will blow you away. It has been a lot of fun for me to crank out some beautiful HDR photos with it!
You can find my other preset packs right here on my presets page if you would like to see them all (but this is the only pack available right now for Aurora HDR 2018).
I love to create these preset packs and I use them on many of my images, too. I think of presets as the “easy button” for photo editing. Sometimes it really just takes that one click to get your shot looking exactly how you imagined it, although of course there are times when a preset is a great starting point to send you off in a new creative direction. Either way, I know you will enjoy this new preset pack and get a lot of mileage out of it.
Introducing Roadtripper
If you have been following me since before this past summer, you may be aware that I took a massive road trip with the family over the course of June, July and August and we covered about 9 states and 2 Canadian provinces. Dang, it was a hell of a lot of driving (but a lot of fun too). On this trip, I captured thousands of photos and these were the inspiration for this preset pack.
These presets range from something you could use on a beautiful sunset and go all the way to a grungy, rusted out old truck - because that is the entire range of what I photographed on this road trip. These presets are designed to work with ALL sorts of scenes, just as you would encounter on a road trip yourself. I like bold, colorful and expressive photos, so my presets are designed to accentuate that, and I think you will be able to see that theme in the sample screenshots below.
Don't forget you can stack presets for more fun and experimentation! I often stack 2 presets and adjust the opacity levels of each layer to get interesting and beautiful results. Or stack them and just mask in the part of the preset that fits with your photo. Your options are limitless! Just experiment and have fun. That's what this is all about, anyway. Create something interesting and have fun doing it.
There are 20 presets in this pack and once loaded in Aurora HDR 2018 it will be displayed as it’s own category of presets, right alongside all the other categories that are built into Aurora (see below for installation instructions).
Go watch it in action!
Here's a video showing many of the presets in action. Take a look! (Can you tell I like doing videos? I think they just work better than reading something, and they are fun for me.)
How To Purchase This Preset Pack
Ready to purchase this preset pack? You can click on “Add to Cart” below, or visit my presets page. Once you complete the purchase process, you will receive an email with a download link for the preset pack file, which you can then import into Aurora HDR 2018. Installation instructions are below.

It sells for the low price of $10.00. That's just $0.50 per preset! Think of all the amazing creations you will use these on!
Thanks for stopping by, and let me know if you have any questions. I appreciate the support very much! I couldn't do this without your support, so I want you to know I am deeply grateful. Thank you!
How To Install A Custom Preset Pack
When you import a custom preset pack such as this one, it will create a new category in the Presets category window, and the presets will be displayed within that category.
See the example to the right. --> Roadtripper is in the bottom right hand corner.
To add a custom preset pack, select the menu item File > Add Custom Presets Pack. An open dialog box will be displayed, allowing you to choose the pack you wish to add.
After you receive your email with the download link, download the preset pack file to your desktop which allows you to easily find it and select it.
Then you start making awesome photos!
Show me some samples, Jim!
Ok, it’s about time to do that, don’t you think? Take a look at all the screenshots below and any of them can be viewed larger with a single click. You will also see the preset name in the screenshots below. This is just a few of them - remember, there are 20 presets in the pack!
Thanks for taking a look and let me know if you have any questions! Click any image to enlarge!
Do you need help using Aurora HDR? Want to create masterful HDR photos?
One thing that I decided to do, upon the release of Aurora HDR 2018, was to create a tutorial series on YouTube. I used to write out lengthy tutorials but I find videos are much better for this. You can follow along and watch what I do, instead of just read about it, and I think that's way better. So, if you need help with Aurora, check out my Aurora HDR 2018 Tutorial Series over on YouTube. The tutorial itself is a collection of 10 videos covering the basic all the way to advanced techniques, and there are a few other videos in the set, too. I think you will enjoy this quite a lot! And yes, these are all free!
Click here to see my entire collection of Aurora HDR 2018 videos.
Here's a sample of what you will see there...enjoy!
Thank you and enjoy the presets!

Luminar Tip: Apply Presets with the Gradient Mask
You can quickly apply a preset to a photo using the Gradient Mask, allowing you to selectively control how it is applied to the photo. Take a look at this short video!
Here's a recent video where I show you how to quickly apply a preset to a shot using the Gradient Mask. It's quick and easy, and gives you the flexibility to selectively apply the preset to a portion of the photo.
In this example, I apply one preset to the top of the photo using the Gradient Mask, and then add a new layer and quickly apply a different preset to the bottom of the photo the same way.
This gives you a bit more speed when editing than just brushing in the preset. Give it a go!

Announcing "Cityscapes", a HUGE new preset pack for Luminar!
Announcing "Cityscapes", a brand new preset pack for Luminar by Macphun. It includes 40 presets for use in urban environments, and it's awesome! Check it out!
Another preset pack for enhancing your Luminar experience - my biggest preset pack yet! Here are 40 shiny new presets designed for urban environments!
Hello friends, I am back with another preset pack for Luminar - this time, it’s all about cityscapes! You can find my other preset packs right here if you would like to see them all.
Don’t have Luminar yet? Shame on you. ;-) You can click on the banner below to buy it from the Macphun website. Trust me when I tell you that you will love it. You can also download a free trial at their site if you want to test drive it first. You can do SO MUCH with Luminar that it will blow you away. It has completely changed my photo editing, making it faster and better!
I spend nearly all my time in Luminar now. While my photos are managed in Lightroom, I take them into Luminar for the majority of my edits. I find Luminar to be more powerful and capable than Lightroom, with more filters to experiment with, too. In fact, I recently shared my thoughts about 5 of my favorite Luminar filters that don’t exist in Lightroom, in case you would like to read that.
I love to create these preset packs. It’s not just fun for me, but educational as well. It makes me really dig into the product deeper and forces me to get out of my habitual edits to craft something new and interesting. I also use my presets ALL THE TIME. Sure, I create them and sell them here, but I also use them on all my images. I love them, or else I would not put them out there. I hope you feel the same!
I think of presets as the “easy button” for photo editing. Sometimes it really just takes that one click to get your shot looking exactly how you imagined it, although of course there are times when a preset is a great starting point to send you off in a new creative direction. Either way, I know you will enjoy this new preset pack and get a lot of mileage out of it.
Introducing Cityscapes
I have long been a fan of shooting in cities. While I yearn to photograph epic landscapes such as those in New Zealand or Iceland - like everyone else that has ever held a camera - the truth is that I rarely get an opportunity to visit those sorts of places. I tend to visit cities, and I learned long ago that cities are rich with photographic opportunities. There is an overabundance of shots to be taken in any city. You just have to step outside.
Over the years, cities have become my favorite photographic playground. I actually prefer them at this point. I think a city offers an unlimited amount of great subjects, and that’s why I like them so much. In a city you can shoot skylines, street scenes, light trails, portraits, architecture, graffiti and urban grunge, neon and other signs, churches, bridges, rivers and more. And many of these subjects can be shot in just about any light, from early sunrise on into the late night.
So as my adoption and use of Luminar for photo editing has evolved, so has my eye for editing these urban shots in Luminar. I have taken dozens and dozens of my city photos and brought them into Luminar to build these presets. I have experimented with a lot of different looks on a lot of different types of photos. There is a lot of variety in this pack, just as there is a lot of variety in a city.
These presets range from something you could use on a sparkly skyline shot at sunset or blue hour and go all the way to a grungy, disused alley full of graffiti and grit. Yes, several of these presets are designed for grungy and gritty scenes, because they are frequently encountered in a city and frankly, I find them beautiful. I love to photograph the obviously beautiful stuff, but I get an equal amount of enjoyment from the non-traditional beauty you can find only in a city.
Assuming you have seen some of my work, then you know that I like bold, colorful and expressive photos. In this pack, I also have created presets with a lot of structure and detail to enhance those urban scenes. These presets are designed as big moves, and not just barely-noticeable minor adjustments. Big moves are good. Minor changes are a waste of time.
Don't forget you can stack presets for more fun and experimentation! I often stack 2 presets and adjust the opacity levels of each layer to get interesting and beautiful results. Or stack them and just mask in the part of the preset that fits with your photo. Your options are limitless! Just experiment and have fun. That's what this is all about, anyway. Create something interesting and have fun doing it.
There are 40 presets in this pack - yes, 40! - and once loaded in Luminar it will be displayed as it’s own category of presets, right alongside all the other categories that are built into Luminar (see below for installation instructions).
I even recorded a video showing many of the presets in action. Take a look!
How To Install A Custom Preset Pack
When you import a custom preset pack such as this one, it will create a new category in the Presets category window, and the presets will be displayed within that category.

See the example to the right. -->
To add a custom preset pack, select the menu item File > Add Custom Presets Pack. An open dialog box will be displayed, allowing you to choose the pack you wish to add.
After you receive your email with the download link, download the preset pack file to your desktop and that allows you to easily find it and select it.
Then you start making awesome photos!
Show me some samples, Jim!
Ok, it’s about time to do that, don’t you think? Take a look at all the screenshots below and any of them can be viewed larger with a single click. I included the split screen Before/After view so you can see the impact each preset has on an image. You will also see the preset name in the screenshots below. Many of these are the same as shown in the video above, in case you didn't watch that.
Thanks for taking a look and let me know if you have any questions!
Thank you again and enjoy!

Luminar Tip: Combining Textures with Presets
In this new video, I show how I combine textures and presets to customize the look of my photo. It's a fun and creative experiment and I think the results speak for themselves. Take a look!
Sometimes a texture by itself just isn't enough...
I admit that I have become a huge fan of presets over the last year or so. Prior to that, I never used them, regardless of which product I was using. I always wanted to build my photo from the ground up. But first in Aurora HDR and then in Luminar, I have really integrated using presets into my workflow on literally every photo.
If you are interested, you can find all my preset packs right here.
Historically, when I would add a texture to a photo I would just add it, make a couple of minor adjustments, and call it "done". But my love of presets has crept over into my use of textures and has resulted in me starting to combine them both on my textured images. I believe the results are quite nice, but then again I'm a little biased. :-)
Here's my latest video showing how I use both textures and presets to edit an image. Take a look and let me know if you have any questions. Thanks!

Announcing "A Moveable Feast" - A Preset Pack for Luminar
Announcing my latest preset pack for Luminar, A Moveable Feast! It's a beautiful collection of 33 presets designed to give your photos some one-click awesomeness. Read on for details, screenshots and more!
More preset awesomeness for your Luminar experience!

Hello friends - I’m back with another preset pack, and this time it’s another one for Luminar by Macphun. My previous preset pack for Luminar, Wanderlust, can be found here.
Don’t have Luminar yet? Shame on you. ;-) You can click on the banner below to buy it from the Macphun website. Trust me when I tell you that you will love it. You can also download a free trial at their site if you want to test drive it first.
The more I use Luminar, the more I want to use Luminar. It has almost completely replaced Lightroom in my workflow. In fact, apart from managing my library in LR, I rarely use it anymore. I have been dumping folders of raw files on my desktop, and dragging them from there straight into Luminar to edit. It’s been great.
Luminar is truly a remarkable product, and it will only get better as Macphun continues to innovate and add new features. I’m excited about the possibilities! Though the product is only a few months old, they have already added new filters to it. It just keeps getting more and more awesome. Can you imagine what it will be like in a year? Two?!
Presets are like hitting the “easy button” for photo editing. Sometimes it really just takes that one click to get your shot looking exactly how you imagined it, although of course there are times when a preset is a great starting point to send you off in a new creative direction. Either way, I know you will enjoy this preset pack and get a lot of mileage out of it. I had a lot of fun making them. It's great to experiment with this stuff.
Introducing A Moveable Feast
I named this preset pack A Moveable Feast which is a direct reference to the book by Ernest Hemingway. While technically the term refers to religious holidays that do not occur on the same calendar date each year (and thus, are moveable), I think ole Papa Hemingway really meant that the experience of being in Paris will move with you throughout your entire life. The memories, experiences and mental photographs you take will stay with you forever. They will live on in your imagination, with a sort of halo around them. You may return home to Texas like I have, but Paris will always stay with you. That seemed like the perfect name for this collection. I can't get Paris out of my head or my heart.
As you will see I have also named the individual presets with French themes. I have had the good fortune to visit Paris many times in my life, and all of the sights, sounds and experiences have had a direct influence upon the creation of these presets. To me they capture the beauty of this incredible city. I feel so artistically inspired when I am there, and actually started creating these presets while I was still there enjoying the city. I would come home from shooting, copy my files to my desktop, and start bringing them into Luminar. Presets just started getting made. ;-)
This preset pack was built for cityscapes and street scenes, landscapes, architecture, train stations, sunsets/sunrises, and probably just about everything else. There are boldly colorful presets and some monochromes, too. I've even built a couple of vintage-style and almost film-look presets, just 'cause. It's all there. Assuming you have seen some of my work, then you know that I like bold, colorful and expressive photos. These presets are designed as big moves, and not just barely-noticeable minor adjustments. Big moves are good. Minor changes are a waste of time.
Don't forget you can stack presets for more fun and experimentation! I often stack 2 presets and adjust the opacity levels of each layer to get interesting and beautiful results. Just experiment and have fun. That's what this is all about, anyway.
There are 33 presets included in this pack - yes, 33! - and once loaded in Luminar it will be displayed as it’s own category of presets, right alongside all the other categories that are built into Luminar (see below for installation instructions).
I even recorded a video showing many of the presets in action. Take a look!
Ok, quite a few screenshots are included below - and click any image to enlarge for better viewing. Enjoy and let me know if you have questions!
How To Purchase This Preset Pack
Ready to purchase this preset pack? You can click on “Add to Cart” below, or visit my presets page. Once you complete the purchase process, you will receive an email with a download link for the preset pack file, which you can then import into Luminar. Installation instructions are below.
It sells for the low price of $7.00. That's just $0.21 for each preset!
Thanks for stopping by, and let me know if you have any questions. I appreciate the support very much! I couldn't do this without your support, so I want you to know I am deeply grateful. Thank you!
How To Install A Custom Preset Pack
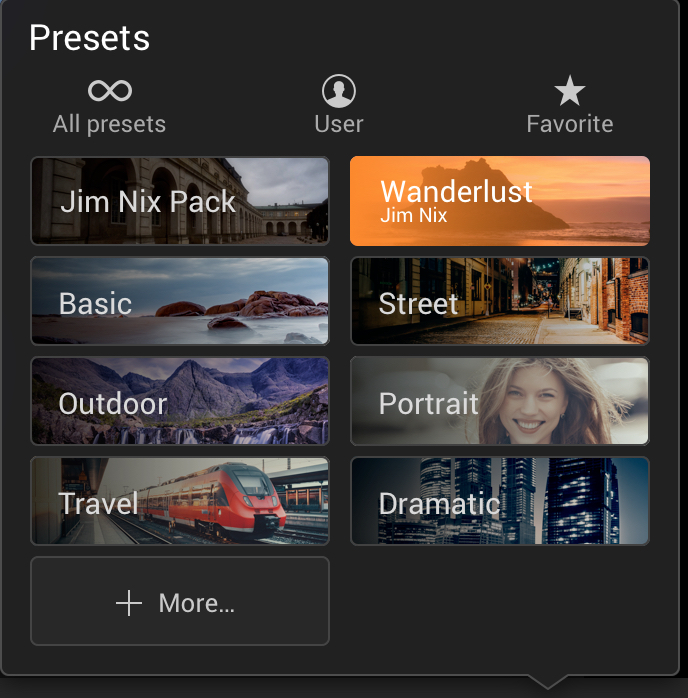
When you import a custom preset pack such as this one, it will create a new category in the Presets category window, and the presets will be displayed within that category.
See the example to the right. -->
To add a custom preset pack, select the menu item File > Add Custom Presets Pack. An open dialog box will be displayed, allowing you to choose the pack you wish to add.
After you receive your email with the download link, download the preset pack file to your desktop and that allows you to easily find it and select it.
Then you start making awesome photos!
Show me some samples, Jim!
Ok, it’s about time to do that, don’t you think? Take a look at all the screenshots below and any of them can be viewed larger with a single click. Thanks for taking a look and let me know if you have any questions!
Thank you again and enjoy!

Get My Free Luminar “Magic Hour” Preset Pack and Workspace!
How about some free stuff? Here is a free preset pack for Luminar, designed for those Magic Hours of photography that we all love. Enjoy! Tell your friends!
A Free Luminar Preset Pack and Workspace Designed Specifically for the Magic Hours of Photography!

In case you haven’t noticed, I’ve been spending a lot of time working with the new Luminar app from Macphun. I write about it here on the blog, I have done some videos about it on YouTube and I post about it on Facebook. The more I use it the more I find to love about it. I even created a preset pack for it (named Wanderlust because it was inspired by my travels), which has been rather popular. Missed that one? You can read about it right here.
Don't have Luminar? Get it right here. Or download a free trial and try it out! Or click the banner below. You have options! ;-)
Even though my Wanderlust preset pack was just published, I have been working hard on creating even more presets. I love using presets and there is just so much flexibility in Luminar. In fact, I have a bunch of new presets I have been working on that are inspired by my recent trip to France. But, that’s news for another day (and likely in January, anyways). So you will hear more about that later.
Introducing Magic Hour, a free preset pack and workspace!
Right now I want to talk about a new, different preset pack: Magic Hour. While I have been working on the France-inspired presets, I kept coming back to the idea of creating a workspace and some presets that I would use on sunset-type shots. So after some experimentation I settled on and created a workspace and then a couple of sunset presets, and that was that.
But I couldn’t let it go - it just didn’t seem finished - so I came back to it again and again, and started adapting it for the rest of the magic hours that we love so much as photographers, to include blue hour, golden hour and twilight. They are all just variations on a theme anyways, and are all built on the same workspace. So it just seemed that adding those made sense.
I was trying to figure out how to release this pack, since it’s not nearly as large as my previous preset packs (which each have 25 presets), and it didn’t seem fair to charge for it anyways, since I didn’t plan to add any more to it, and I admit there is not a ton of variation between them all. It felt complete, so here it is. I hope you enjoy it.
So as a “thank you” to everyone out there who has been so supportive of my work, I thought I would just release this mini-pack of 8 presets for free. I also created a workspace for this, and that’s a free download, too. So THANK YOU for the support, enjoy the presets and the workspace, and have fun creating your own beautiful photographs.
Note: These presets and workspace were created prior to the launch of the new Golden Hour filter in Luminar, so it is not part of the workspace or presets. Obviously you can add it if you would like to, but I wanted to clarify that it was not left out for any reason other than the fact that it didn't exist when these were created. ;-)
Download link and installation instructions!
You can download both the preset pack and the workspace right here.
Note: Your download will include a single zip file. Open it and you will have 2 files: one is the preset pack (Magic Hour-2.mplumpack) and the other is the workspace (Magic Hour.plist). To install the preset pack, open Luminar and choose File>Add Custom Presets Pack. A window will open allowing you to choose this preset pack from your desktop. It will show up as its own category in the Presets window. Then for the workspace file, locate your workspaces folder by opening Luminar and choosing File>Show Workspace Folder. Drag this workspace there.
Before/After screenshots...
And here are some screenshots showing you Before/After comparisons for the 8 presets. Keep in mind that if you find the colors too intense you can always just reduce the opacity, change the blend mode, etc. Feel free to experiment and don't hesitate to tag me if you post it on FB. I love seeing what you do with my presets! I hope you enjoy these! If you don't...well...at least you can't complain about the price. ;-) If you do enjoy them, please do me a small favor and share with your friends on Facebook!
(and click any image below to enlarge)
Blue Hour Pop 1
Golden Hour Pop 1
Sunset Pop 1
Twilight Pop 1
Blue Hour Pop 2
Golden Hour Pop 2
Sunset Pop 2
Twilight Pop 2

The Power of Luminar tutorial
Today I show you how I created a stunning evening photo with the Milky Way overhead from a flat, boring sunset shot. It's a quick video but I think you are going to like this!
I put together a short video showing how powerful Luminar is - check it out!
It's no secret that I love Luminar, the new photo editing app from Macphun. I have been using it on just about EVERYTHING lately, and boy is it powerful. I am able to create so many different looks in just a couple of quick minutes. All it takes is some experimentation and I always end up with something fun, interesting and beautiful.
Today's photo and video is a great example of that. I recently shared a video about how you can easily replace a sky in Luminar. You know, swap out a boring sky for a lovely sunset. It's quick and easy. But then I started thinking about instead of putting in a better sunset, how about putting in a NIGHT SKY? You know, a little Milky Way action could look cool, right?
Well, it does look pretty awesome I think!
I took the below photo of the Loop 360 Bridge in Austin and added in a photo of the Milky Way that I took some years back along the coast of Oregon. I then added in a couple of my new Luminar presets, and BAM! I had an entirely new image.
Here is the base image. Not a bad shot, but I wanted to try something fun with the sky.
And here is the image after adding in a few sky, applying a couple of presets, and making some minor adjustments in Luminar. It's like an entirely new photo!
Here's the video showing how I create this photo...
Quick and easy, right? I love doing this stuff - it's so much fun!
If you don't have Luminar yet, you can get it here on the Macphun website. Or, just click on the little banner below and it will take you to their site.
Thanks for stopping by and let me know if you have any questions!

Announcing my Wanderlust Preset Pack for Luminar
Today I release the Wanderlust preset pack for Luminar. It's a collection of 25 presets inspired by my travels. Take a look and let me know if you have any questions!
Preset fun for Luminar!

Hi there again - I’m back with another preset pack, but this time it’s for Luminar by Macphun. My previous preset pack was for Aurora HDR 2017. Missed that one? Get it here.
Don’t have Luminar yet? Shame on you. ;-) You can click on the banner below to buy it from the Macphun website. Trust me when I tell you that you will love it. You can also download a free trial at their site if you want to test drive it first.
I have been using Luminar for quite a while now, since I was an early beta tester and also worked on all the training videos, which you can watch here. So I've gotten really familiar with it and now can't imagine NOT using it. It would be like losing a limb, sort of. Ok, that's a little drastic, but I totally depend on it now. It's amazing, and has become an integral part of my editing workflow.
I enjoyed Luminar from the start and the more I have used it, the more I love it. It’s a remarkable product, and it will only get better as Macphun continues to innovate and add new features. I’m excited about the possibilities!
In case you aren't familiar with Luminar, here is a recent video I did using a bunch of tools in Luminar and completely revamping the image - in 5 minutes. This ought to give you a good sense of how powerful and easy it is to use. Plus, you sort of get a preview of a couple of presets from this pack, which I used on this image.
My first preset pack for Luminar!
Once I started editing a lot of images in Luminar, I started also making some presets. I find that there are often certain looks that I am going for in a photo, and instead of having to recreate them each time, I can now just click a single button to get me there, or at least get me close.
I like to think of presets as the “easy button” for photo editing. Sometimes it really just takes that one click to get your shot looking exactly how you imagined it, although of course there are times when a preset is a great starting point to send you off in a new creative direction. Either way, I know you will enjoy this preset pack and get a lot of mileage out of it. I had a lot of fun making them. It's great to experiment with this stuff.
I named this preset pack Wanderlust, because as a travel photographer I have a serious case of it, and it just seemed fitting. Nearly all my images are from “somewhere else” as opposed to being from my home city. As I edited photos from various trips in Luminar, I created presets so I could reuse that look again and again. Then I named that preset after the trip, or that particular experience, or perhaps how I was feeling when I took the photo that inspired the preset.
This preset pack was built with common travel themes in mind: cityscapes and street scenes, landscapes, architecture, sunsets/sunrises, and probably a lot of other stuff I can’t think of right now. ;-) There are boldly colorful presets and a few monochromes, too. It's all there.
As you probably know by now - assuming you have seen some of my work - I like bold, colorful and expressive photos, even if they are monochrome (well, except for the colorful part in those of course!). In other words, these presets are not just minor adjustments, they are big moves and I think you will be able to see that in the screenshots that I provided below.
Don't forget you can stack presets for more fun and experimentation! Also mix up opacities and change blend modes and get creative! Luminar lets you do it all.
There are 25 presets included in this pack, and once loaded in Luminar it will be displayed as it’s own category of presets, right alongside all the other categories that are built into Luminar (see below for installation instructions).
Ok, several screenshots are included below - and click any image to enlarge for better viewing.
How To Purchase This Preset Pack
Ready to purchase this preset pack? You can click on “Add to Cart” below, or visit my presets page. Once you complete the purchase process, you will receive an email with a download link for the preset pack file, which you can then import into Luminar. Installation instructions are below.
It sells for the low price of just $5.00. What a bargain! ;-)
Thanks for stopping by, and let me know if you have any questions. I appreciate the support very much!
How To Install A Custom Preset Pack
When you import a custom preset pack such as this one, it will create a new category in the Presets category window, and the presets will be displayed within that category.
See Wanderlust in the example to the right. -->
Don't confuse this Wanderlust preset pack with the "Jim Nix Pack" which is a small, free preset pack I made available via Macphun's website. You can find that here.
To add a custom preset pack, select the menu item File > Add Custom Presets Pack. An open dialog box will be displayed, allowing you to choose the pack you wish to add.
After you receive your email with the download link, download the preset pack file to your desktop and that allows you to easily find it and select it.
Jim, show me some of these presets!
Ok here are a dozen or so screenshots, showing the range of options this preset pack contains. Take a look and let me know if you have any questions, and thanks again for the support! Click any photo to view in a lightbox.
Ok that's all I have for today, but hopefully you find enjoyment in this stuff like I do. Download the preset pack and start editing photos right away! I appreciate the support and thanks for stopping by!

Announcing my Bella Italia Preset Pack for Aurora HDR 2017
Announcing the Bella Italia Preset Pack for Aurora HDR 2017 - take your photos to the next level with these 25 beautiful presets! Now available for the low price of $5.00!
Hello everyone and thanks for stopping by. I made a preset pack for Aurora HDR 2017. Curious? Good, keep on reading.
I have been using Aurora HDR 2017 since it was in beta and I created all the training videos for Macphun’s website, which you can find here: https://aurorahdr.com/video-tutorials
It’s an incredible product and there is nothing better for creating HDR photos (oh, and it’s pretty awesome on single exposures, too). I love it and use it all the time.
How This All Got Started
My family and I took an extended holiday a few months back, spending nearly 6 weeks traveling around the incredible country of Italy. We were very fortunate that this trip was able to come together, and I can honestly say that it had a huge impact on our lives. Italy can do that to you.
As we traveled from city to city we toured museums, strolled historic town centers, witnessed amazing sunsets, gazed at incredible sculptures and dove into the chilly Mediterranean Sea. It was amazing. All along, I was firing brackets like a madman. I returned with over 14,000 photos. Not bad, huh? :-)
I left feeling inspired, humbled, and excited about processing the 14,000 photos that I accumulated! A trip like this really makes you step back and consider how much beauty our world contains...and of course it makes you want to edit your photos. :-)
Some Insights Into This Preset Pack
Upon my return, I immediately started processing photos from the various places, and found that each type of photo seemed to have a theme in terms of how I was processing them in Aurora HDR 2017. So I started making presets for those images, and naming them after the subject itself or the name of the place where I had taken the photo, or something in the scene that got my attention. Thus this preset pack was born.
I named this preset pack Bella Italia because I found the country to be incredibly beautiful. That’s not exactly news to anyone, but it’s true! Literally, everything is beautiful. I don’t know how anyone gets anything done there! I would just wander and wander with the camera. And eat pizza. Yes, definitely eat a lot of pizza.
This preset pack covers a lot of ground photographically, from cityscapes and landscapes, to seascapes, street scenes, sunsets, sculptures and statues, architecture and more! It ranges from expressively colorful to starkly monochromatic. And if you look at my photos, you know that I do not go for tiny, minor, almost-impossible-to-tell type of adjustments. I like bold strokes, and you will see that in the screenshots.
You can try these presets out on any sort of image. No, every preset does not look good on every photo - it just doesn’t work that way. But I know that you will find something for everyone in this preset pack, and I sure hope you enjoy using them on your images as much as I enjoyed creating them.
There are 25 presets included in this pack, and once loaded in Aurora HDR 2017 it will be displayed as it’s own category of presets, right alongside all the other categories that are built into Aurora HDR 2017. Creativity is at your fingertips my friends!
I have included some sample images below (click any image to enlarge) so you can get a sense of what the pack contains. Even if you don’t purchase the preset pack, I hope you get inspired to experiment with Aurora HDR 2017, and of course I appreciate your visit here today to check it out.
How To Purchase the Preset Pack
Ready to purchase this preset pack? You can click on the "Add To Cart" icon below, or visit my Presets Page.
It sells for the low price of just $5.00. That's barely a cup of coffee. :-)
Thanks for stopping by, and let me know if you have any questions. I appreciate the support very much!
How To Install A Custom Preset Pack
When you import a custom preset pack such as this one, it will create a new category in the Presets category window, and the presets will be displayed within that category.
To add a custom preset pack, select the menu item File>Add Custom Preset Pack. An open dialog will be displayed, allowing you to choose the pack you wish to add.
NOTE: This preset pack only works with Aurora HDR 2017, not the previous versions. If you don’t have Aurora HDR 2017 yet, you can get it here.