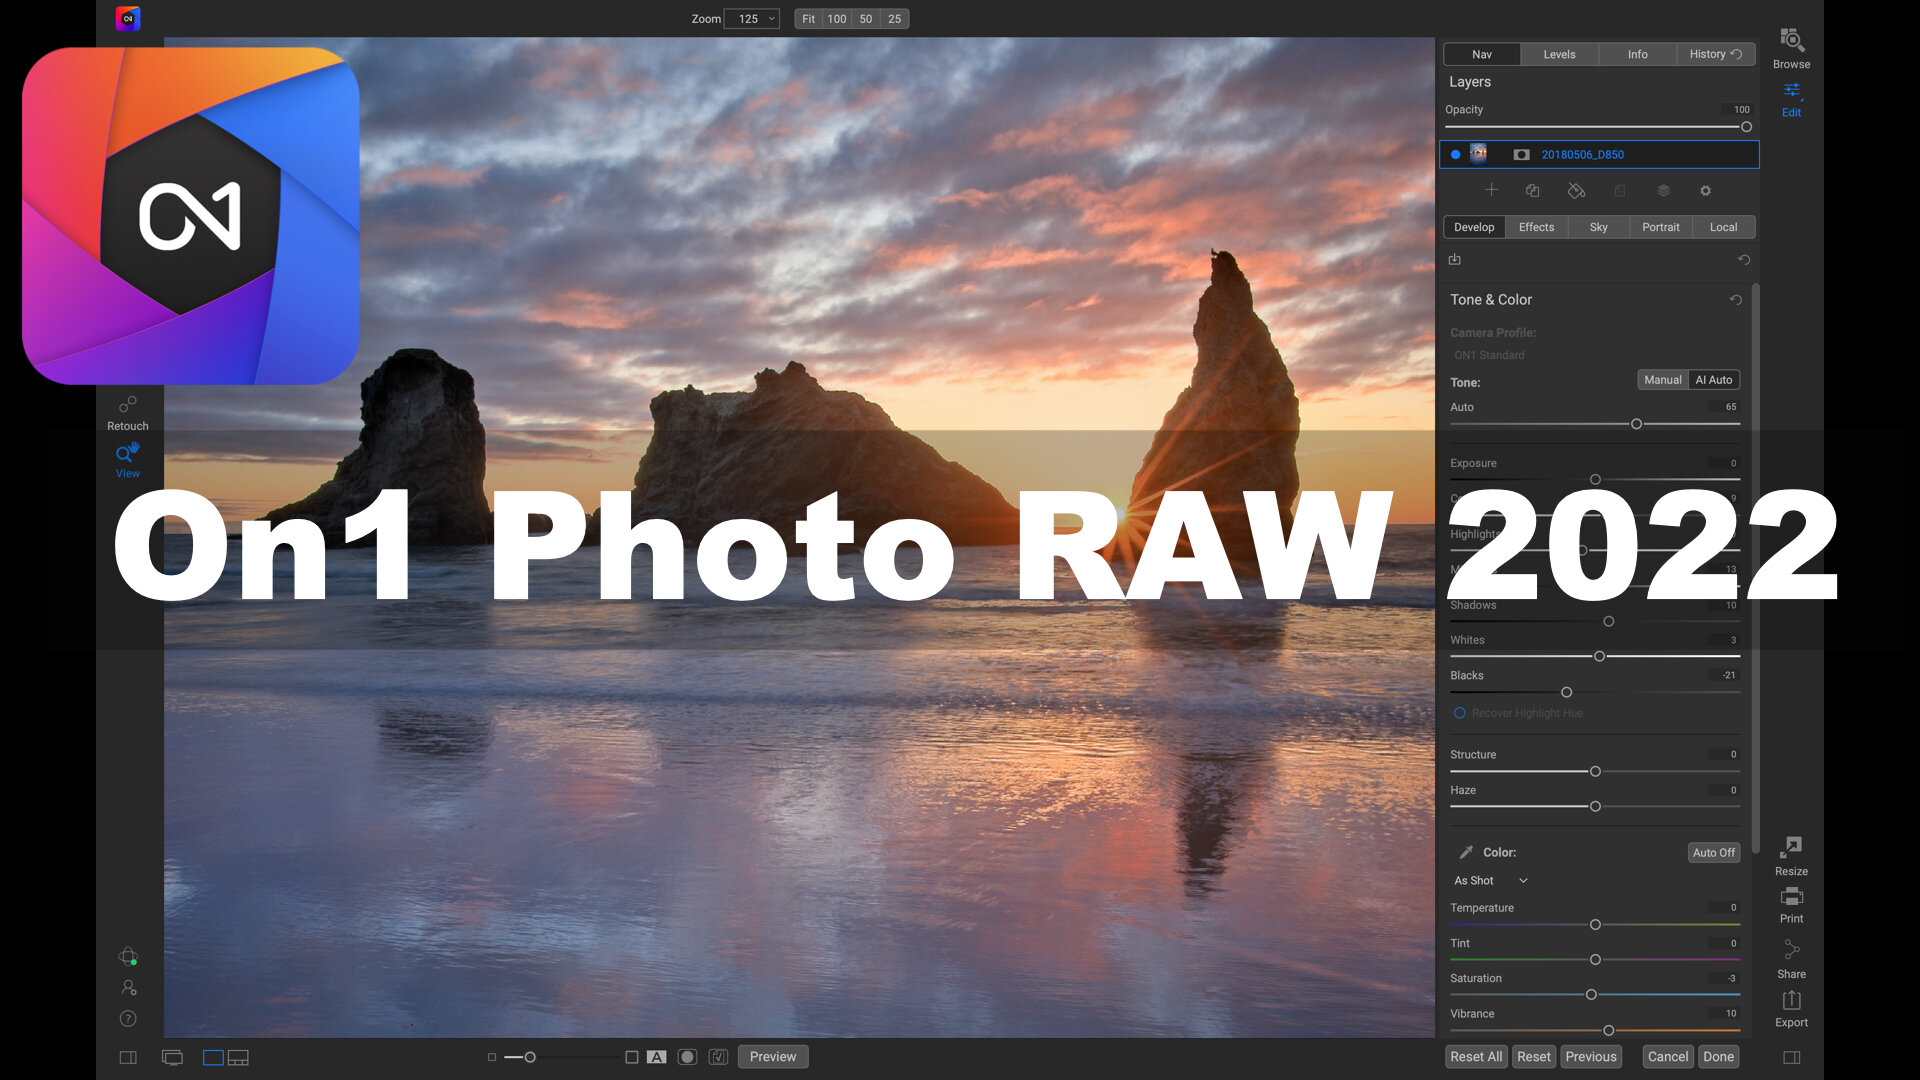
On1 Announces Photo RAW 2022!
On1 Announces Photo RAW 2022 - and it looks amazing! Check out these new features!
This product looks like it’s going to be amazing!
I have been using On1 Photo RAW 2021 throughout this entire year, and have really grown to both appreciate all of its advanced capabilities, and just plain love the use of it. It gives me so much power and flexibility in my editing. Now, On1 has just announced the latest version which is coming soon - and I am really excited about all the new tools it will have!
Preorder On1 Photo RAW 2022 here: https://bit.ly/3BC1BlS

It will be available around the end of September, and will sell for $99.99 for a perpetual license (new user), and if you have an older version the upgrade cost is $79.99. They will also offer a free 14 day trial at launch.

The product is not out yet, so I don’t yet have a copy. But when I get it, you can rest assured that I will be sharing some tips and tricks on my YouTube channel, showing it in action. Until then, let’s take a quick look at all the new stuff that is coming!
Sky Swap AI - automatic sky replacement, including giving you full access to the mask that is automatically created, so you can reuse it for other parts of your edit
Time-Lapse Creation - quickly create time-lapse videos from still photo sequences
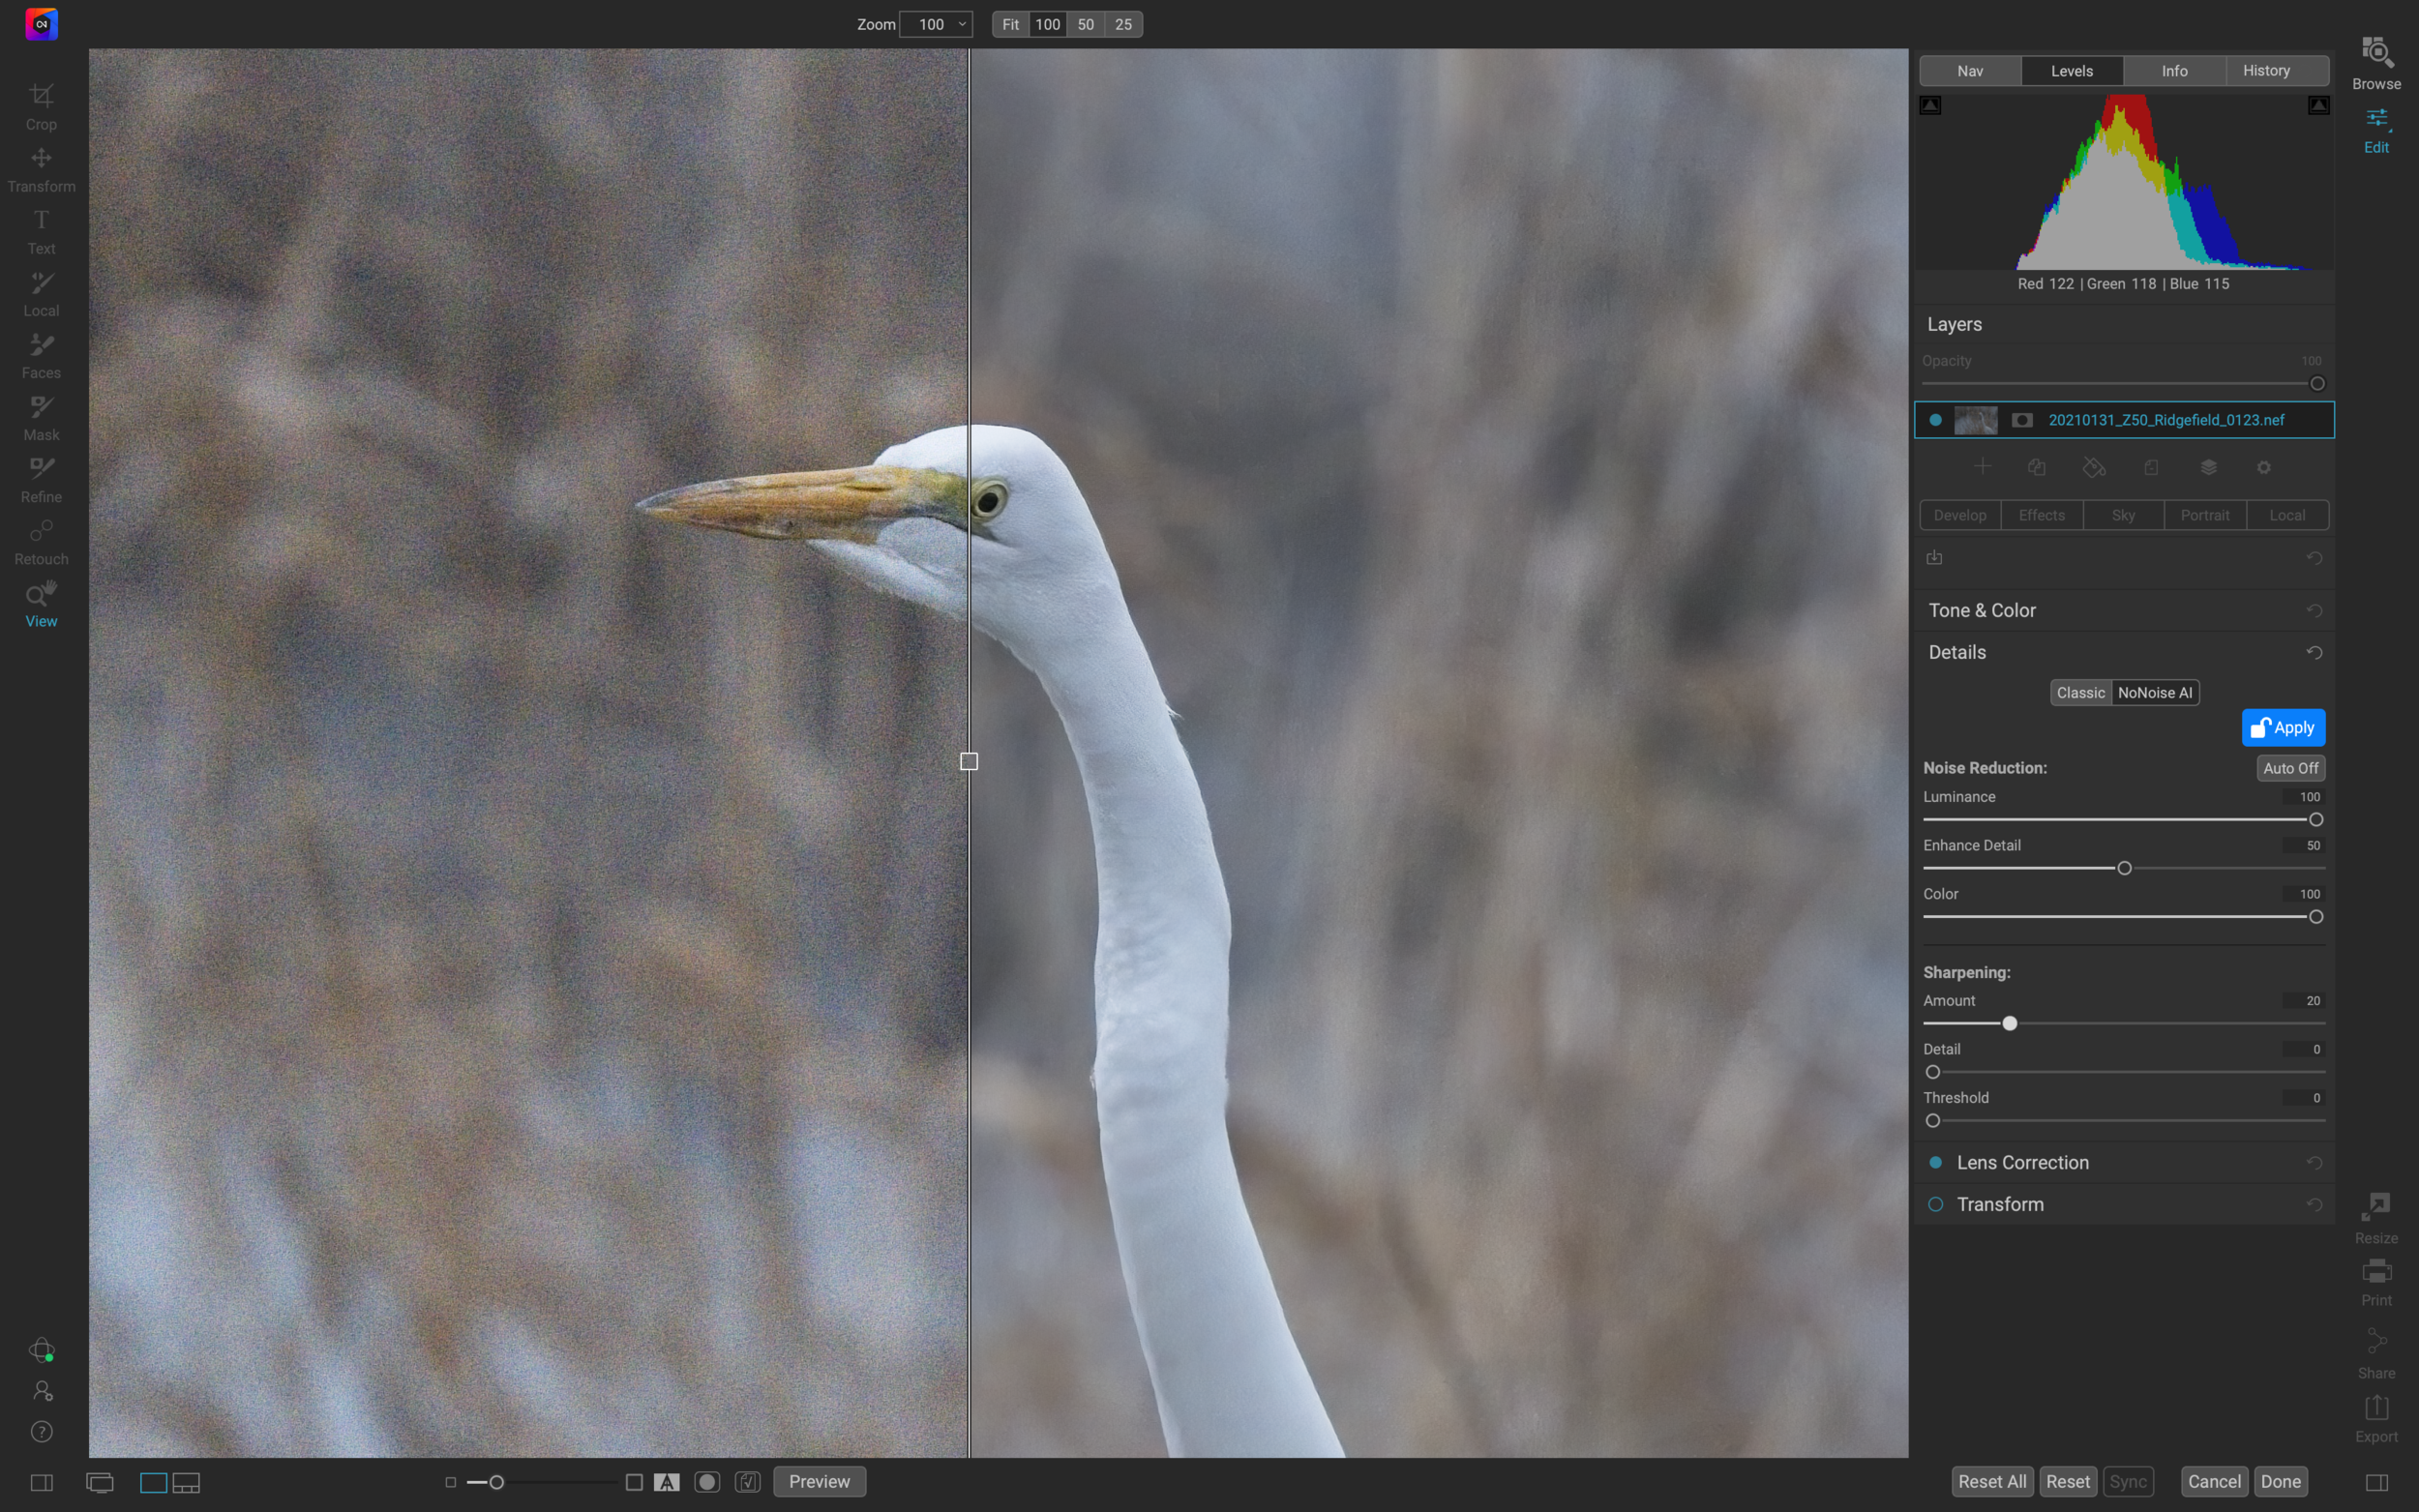
Integration of NoNoise AI - their amazing noise reduction is now integrated into your raw workflow
Photoshop Plugin Host - run your other plugins inside of Photo RAW
Line Masking - quickly create masks using straight lines
And more, such as a retooled Export menu, backup and restore options, Apple Silicon support and the list goes on!
Click the link above to reserve your copy! Demo videos are coming soon!
And of course, I prepared a pre-release analysis video talking about this release as well. Check it out below!
Here are some screenshots that they provided me, showing the UI of some of these new tools. I really think this is going to be a fantastic product, and continue to be a powerful and flexible all-in-one editor.

Master Dodge & Burn in Luminar
Dodge and burn is a powerful tool in Luminar that helps you control the brightness in specific parts of an image. In this video I share how to use it effectively along with a couple of other tricks that may help!
Are you curious about dodge & burn? Not sure how it works, or even what it means? This video will help you get firm control over how to manage the light in your photos, using Luminar.
Dodge and burn is a tool in Luminar that allows you to selectively lighten or darken certain areas of the image using a brush. You control the amount of lightening or darkening with sliders and just brush in the adjustments. It's quite straightforward.
But in this video I also share another couple of tricks I like to use to really control the light and manage the exposure across parts of the image. I use some specific filter and masking combinations that work great. I demo those using two different photos. Follow along and enjoy!

Announcing "Roadtripper", a preset pack for Aurora HDR 2018!
My newest preset pack is ready! It's called Roadtripper, and it's for Aurora HDR 2018. Check it out!
Roadtripper: a preset pack for Aurora HDR 2018!
Hello friends, today I am announcing my first preset pack for Aurora HDR 2018. I have been working with this wonderful product for a while now, and have hand-crafted these presets to help you get the most out of your Aurora HDR 2018 experience. You can do SO MUCH with Aurora HDR 2018 that it will blow you away. It has been a lot of fun for me to crank out some beautiful HDR photos with it!
You can find my other preset packs right here on my presets page if you would like to see them all (but this is the only pack available right now for Aurora HDR 2018).
I love to create these preset packs and I use them on many of my images, too. I think of presets as the “easy button” for photo editing. Sometimes it really just takes that one click to get your shot looking exactly how you imagined it, although of course there are times when a preset is a great starting point to send you off in a new creative direction. Either way, I know you will enjoy this new preset pack and get a lot of mileage out of it.
Introducing Roadtripper
If you have been following me since before this past summer, you may be aware that I took a massive road trip with the family over the course of June, July and August and we covered about 9 states and 2 Canadian provinces. Dang, it was a hell of a lot of driving (but a lot of fun too). On this trip, I captured thousands of photos and these were the inspiration for this preset pack.
These presets range from something you could use on a beautiful sunset and go all the way to a grungy, rusted out old truck - because that is the entire range of what I photographed on this road trip. These presets are designed to work with ALL sorts of scenes, just as you would encounter on a road trip yourself. I like bold, colorful and expressive photos, so my presets are designed to accentuate that, and I think you will be able to see that theme in the sample screenshots below.
Don't forget you can stack presets for more fun and experimentation! I often stack 2 presets and adjust the opacity levels of each layer to get interesting and beautiful results. Or stack them and just mask in the part of the preset that fits with your photo. Your options are limitless! Just experiment and have fun. That's what this is all about, anyway. Create something interesting and have fun doing it.
There are 20 presets in this pack and once loaded in Aurora HDR 2018 it will be displayed as it’s own category of presets, right alongside all the other categories that are built into Aurora (see below for installation instructions).
Go watch it in action!
Here's a video showing many of the presets in action. Take a look! (Can you tell I like doing videos? I think they just work better than reading something, and they are fun for me.)
How To Purchase This Preset Pack
Ready to purchase this preset pack? You can click on “Add to Cart” below, or visit my presets page. Once you complete the purchase process, you will receive an email with a download link for the preset pack file, which you can then import into Aurora HDR 2018. Installation instructions are below.

It sells for the low price of $10.00. That's just $0.50 per preset! Think of all the amazing creations you will use these on!
Thanks for stopping by, and let me know if you have any questions. I appreciate the support very much! I couldn't do this without your support, so I want you to know I am deeply grateful. Thank you!
How To Install A Custom Preset Pack
When you import a custom preset pack such as this one, it will create a new category in the Presets category window, and the presets will be displayed within that category.
See the example to the right. --> Roadtripper is in the bottom right hand corner.
To add a custom preset pack, select the menu item File > Add Custom Presets Pack. An open dialog box will be displayed, allowing you to choose the pack you wish to add.
After you receive your email with the download link, download the preset pack file to your desktop which allows you to easily find it and select it.
Then you start making awesome photos!
Show me some samples, Jim!
Ok, it’s about time to do that, don’t you think? Take a look at all the screenshots below and any of them can be viewed larger with a single click. You will also see the preset name in the screenshots below. This is just a few of them - remember, there are 20 presets in the pack!
Thanks for taking a look and let me know if you have any questions! Click any image to enlarge!
Do you need help using Aurora HDR? Want to create masterful HDR photos?
One thing that I decided to do, upon the release of Aurora HDR 2018, was to create a tutorial series on YouTube. I used to write out lengthy tutorials but I find videos are much better for this. You can follow along and watch what I do, instead of just read about it, and I think that's way better. So, if you need help with Aurora, check out my Aurora HDR 2018 Tutorial Series over on YouTube. The tutorial itself is a collection of 10 videos covering the basic all the way to advanced techniques, and there are a few other videos in the set, too. I think you will enjoy this quite a lot! And yes, these are all free!
Click here to see my entire collection of Aurora HDR 2018 videos.
Here's a sample of what you will see there...enjoy!
Thank you and enjoy the presets!

Making the photograph: Sunflower Sunset
Follow along as I take a boring photo and turn it into a stunning sunset!
Here's my latest tutorial on YouTube. This time, I take a photo of a sunflower field, which was taken in bright daylight, and add a new sky to give it a stunning sunset look. Enjoy!

A different approach to Workspaces in Luminar
Using Workspaces in Luminar? Here is a different idea about how to use them to get maximum control over your image!
A different way to use Workspaces in Luminar - and 3 new Workspaces you can download for free!
Create workspaces for specific functions, not photo types, and then stack the workspaces for ultimate control.
I love Luminar, and continually find new things I can do with it, as well as new approaches to editing my images. It’s very capable and flexible and yet it’s not difficult to master. It gives me incredible control over my images and allows me the freedom to craft any look that I can imagine.
One of the more interesting features in Luminar is Workspaces. A workspace is a collection of filters, all accessible via a single click, that can then be used on a photo. Unlike a preset, the filters in a workspace are all zeroed out. The workspace just bundles them together so you can quickly start editing your shot with filters you would commonly use on that style of photograph.
Generally speaking, workspaces are built with a particular type of photo in mind. For example, you might have a workspace for landscape photos, and that workspace would contain the filters you may commonly use on a landscape. The same goes for other photo types, like portraits. With one click, all the filters you want to use on that particular type of photo are ready to go.
However, I have found that using Workspaces in their intended manner wasn’t really working for me.
It has nothing to do with the Workspaces themselves, but rather with my workflow and what I like to do with an image. Although I think the innovation of Workspaces is a great one - and it probably works really well for a lot of photographers - I found that I wasn’t using them consistently and I couldn’t figure out why.
Well, I finally figured it out.
It’s because my approach to editing a photo is pretty much the same, regardless of the type of photo it is. It could be a cityscape, a landscape, or even a portrait and I would approach it the same way and most of the time with the same filters. I also found that I have a particular order in which I like to do things when adjusting a photo.
So basically this rendered the idea of creating workspaces for different photo types a bit useless, since I have discovered that I approach just about every photo the same way, and often use the same filters to achieve whatever it is I am trying to achieve with the photo.
So, how do I approach a photo? Let me explain.
When I bring a photo into Luminar, I first take a few moments to see what needs to be fixed or corrected in the photo, and then I think about what look I am trying to achieve with the photo. Basically it comes down to three categories of adjustments, or functions, if you will. They are:
- Light
- Detail
- Color
These are the 3 major functions/actions that I am applying to a photo (any photo), and that is the order in which I prefer to apply them.
First I want to balance out the light. This could be lifting shadows, darkening an overly bright sky, etc. I want to start with a well-exposed image. That is always my base starting point, and I find it nearly impossible to make other decisions about the shot until it is evenly lit. Secondly, I add in some detail, usually with the Clarity or Structure sliders, as well as a few others. This is usually applied to buildings, streets, etc selectively, so as to avoid applying it to the sky or the water (if present in the photo). Lastly, I make color adjustments to fit my mood or the look I am trying to achieve. This could be simple enhancement like saturation and vibrance, or something more drastic to completely alter the look and feel (color balance shifts, split toning, etc)
That’s it. That’s how I like to do things, and the order in which I like to do them. It feels right, it feels logical, and it works for me.
So essentially this is about crafting workspaces that perform a specific function for me (adjusting light, detail, or color), and then stacking those workspaces on multiple layers for the ultimate in control. It’s actually really quick and simple.
Here’s a companion video showing this technique in action:
A Before and After image comparison...
And here is the before and after version of the photo that I use in the video. You can see that the 3 major functions have been applied here: light, detail and color. The original was too dark, especially in the foreground, and it lacked any real detail. Additionally, the colors were essentially flat and absent. Using these 3 workspaces with filter adjustments helped me bring the shot back to life, and it more closely resembles how I remember it looking that morning!
Download these 3 workspaces for free!
If you are interested in downloading these free Workspaces, you can do that right here. The file is called 3Workspaces.zip and is really small, so it will download quickly.
Also, the way to install these workspaces is to download them to your desktop, open the zip file via double-click, then in Luminar you can find your Workspaces folder by clicking on File > Show Workspaces Folder. Drag these Workspaces there.
(Note: you will be redirected to a 3rd party site, known as MediaFire, from which you can download these files. It is completely safe and I have used them for several years to host files for me.)
Like this sort of free content? I love to create it and share it. If you feel all my training videos, tip & tricks and things like these workspaces is providing value for you, buy me a beer! ;-) You can simply click the link below to make a small donation, which helps me offset my ongoing costs for equipment, hosting, etc. If not, that's cool too my friends. Enjoy this stuff anyways!
You can contribute whatever you feel comfortable with, from $1 on up! Here's the link: https://www.paypal.me/jimnix and thank you for your support! I really do appreciate it, and it helps keep this site running and the content and creativity flowing!
Thanks for stopping by and let me know if you have any questions!
P.S. Yes, I still use my presets on a lot of my images (and I have more that I am working on releasing), but sometimes I just like to start from scratch and see what I come up with. It’s a great exercise in learning Luminar better, too.
P.P.S. If you are looking for insight into how to better use Luminar, take a look at my Luminar Tips page where I have a huge collection of articles you can read, videos to watch, and more!
Luminar Workflow: Speed editing a sunset
Here's a new video showing how I speed edit a sunset photo in Luminar. Enjoy!
Here's another new video, showing how I speed edit a sunset photo in Luminar.
In this one, I add 5 filters to the photo for color enhancement, but mainly I talk about speed editing and how to make it work for you, including using Workspaces. Take a peek and enjoy!

Aurora HDR Workflow video: New Mexico sunset
Finally, a new video! In this one I edit a sunset HDR from New Mexico in Aurora HDR and add a few filters to get it looking just right!
Finally I had time to make another tutorial video! The benefit of being home for a change!
Due to all my recent travels, it's been about 2 months since I last created a video. Two months! And to think I was doing about 1 every week. Well, I am home at least for a little while, and I had some time to make a new video.
Truthfully, I have really missed doing this. It's a lot of fun for me, and I sure hope that yo enjoy seeing them. I have a long list of videos I still want to make, so I hope to get busy doing some of that here pretty soon!
In this one, I take a 3 exposure bracket set and merge it to HDR in Aurora HDR, and then make further adjustments to achieve my vision for the shot. If you want to see my comprehensive HDR tutorial for Aurora, you can find that right here.
Take a look and let me know if you have any questions!

21 Tips to Help You Get The Most Out of Luminar
Are you using Luminar, or thinking about it? There is so much you can do with it. Here are 21 tips to help you maximize your use of this amazing photo editing software!
Grow your Luminar expertise with these 21 tips!
As you can probably tell from my blog posts and videos, I love Luminar and use it on all of my images now. It has literally given new life to my photography in many ways, and I can’t get enough of it. As I get deeper and deeper into it, I find more and more things you can do with it. It’s just so powerful, capable and flexible. It’s amazing.
I started thinking about how everyone can maximize their use of Luminar to get the best results in their own photos. How can you get more out of it? What steps can you take to ensure you are learning as much as possible, and growing your own editing skill set with Luminar? How can you get the most out of your usage of this amazing product?
So I started writing down a few tips about how to get the most out of Luminar, and the list just started growing and growing. It turns out there is a lot you can do to maximize your use of Luminar (and of course I didn't think of it all). Some of these tips may be obvious, and some may seem a little out there, but give it a try and see how it works for you. I am certain there is something here for everyone!
If you don’t have Luminar yet, you can download a free trial here or click the banner below.
Ok, let's get busy!
1) Shoot raw
Raw files contain more data, and data is good, especially if you decide you want to make major changes to your photo. A raw file is just better to have around, period. Sure you need more storage, but that’s a small price to pay for peace of mind and future flexibility. Plus, you never know where your mindset will be in the future, so having a raw file is also great insurance. The raw processing engine in Luminar supports lots of cameras, too (I use Sony and it works great).
2) Edit raw or TIFF only
I do most of my Luminar videos using JPG images, and the image quality is just not as good. I frequently see artifacts in those JPG images. However, I do it because it’s a smaller file and that means it’s quicker (which is good for video) - plus it’s just to demonstrate a technique. But for my real, published work, it’s raw or TIFF only, no exceptions. The quality is much better and it shows in the image. I get no pixelation, no artifacts, and no issues.
3) Create custom workspaces
Using workspaces allows you to customize the look, feel and use of Luminar, and that is very powerful. I have made quite a few workspaces, and they are a serious time-saver. Try this out and you will see what I mean. While there are a few built into Luminar, it’s quick and easy to build your own.
Even if you don't build one for a specific style of photo, you could build one called “My Favorite Filters” or something similar, assuming you have a group of filters you use on nearly every photo (which I certainly do). You could build one for "Color Shifts" or "Color Enhance", for example, that contains filters you would use for that (Color Balance, Color Temp, Cross Processing, Golden Hour, Saturation/Vibrance, etc). The options are limitless, really. But taking advantage of this innovation in Luminar is a time-saver and also ensures you are using the filters you intended to use on a photo (and not forgetting stuff).
4) Try out some presets, with intent
Although this sounds like a shameless plug (since I create and sell presets, right here), I am not asking you to buy my presets (and to those of you who have, thank you very much!). You can get some off the Macphun website (on their site, scroll to the bottom and look at the footer menu under "Extras", click on "Luminar Presets") or elsewhere, or use the ones that come built into Luminar (or get my Magic Hour pack for free - it is 8 presets designed for the magic hours of photography, such as sunset, golden hour and blue hour). I think using Presets is a quick and cost-effective (or free!) way to learn more about using many of the filters and helping you determine what you want your photos to look like.
Apply a preset, but then go look at the filters that make it up and see how they impact the photo by clicking each filter on and then off. Pay close attention to what happens to the photo when you do this. Read the filter description, or find a video that details it on the Macphun site. Read the Macphun user manual which is on the Macphun site (click on "Luminar", then scroll about halfway down the page and click on "User Guide"). This guide provides some detail about each filter.
5) Now customize the presets a little
This is the next step after you apply a standard preset to your image. Get into the filters and move them around a little bit. See what that does to your image. Try another preset and do it again. The more you experiment with presets (and thus, the filters that comprise them), the more quickly you will master this stuff. It’s really not hard, it just takes a little time.
6) Blindly recreate a preset
Now, without looking, see if you can recreate a particular look of a preset without writing down or otherwise memorizing the filters that were included. This isn’t a graded test obviously, but rather another big step to take in your education. Can you replicate something that you like without using a preset? Do you know the filters well enough to do so? You’ll be surprised at how quickly you start to get a handle on this stuff. It just takes practice and experimentation, which is pretty fun anyways, right?!
7) Build your own presets
Ah yes, this is the final step in the presets section of Luminar. Make your own stuff, from the ground up. Build something cool. You can keep it to yourself or share it with your friends. It doesn’t matter, just make something that is all yours. I make presets all the time. Some of them make it into my preset packs, and some make it into the trash can - but either way, it's a great exercise. Having made quite a few presets myself, I can tell you there is a real joy in creating this stuff and seeing it function across multiple images. It’s like you have been given a key to unlocking a door to creativity. Walk through that door!
8) Try out filters that you don’t understand
This is a huge thing to do, because it involves setting fear and confusion aside and just going for it. But it’s quite fun and you will certainly learn something along the way. There are a LOT of filters built into Luminar, and you have to experiment a bit to really get your arms around some of them. I think the Curves Filter probably comes to mind for many. It can be a bit intimidating, but really it’s pretty simple and it’s incredibly powerful. But if you don’t try it, you will never know, will you? ;-)
And if the Curves Filter is the bane of your existence, maybe this video will help:
9) Get familiar with layers
One of the most powerful features of Luminar is Layers. This is a HUGE advantage that is built into Luminar, and once you get your arms around it, it really is pretty simple. Being able to add a new layer gives you incredible flexibility in your processing, and opens up a lot of new creative edits, such as adding a texture or even replacing a sky. While this may sound intimidating, it’s rather easy and of course there are some videos you can watch that demonstrate how to use layers.
Here is an example video showing how I replace a sky in a photo:
10) Get familiar with layer masking
Once you have gotten used to adding layers, start to experiment with layer masking. This is a simple trick that allows you to just brush in part of the new layer on top of your photo. For example, you can add a preset on top of your photo on a new layer, but just use it in the sky by using layer masking. Super powerful and not hard to do at all.
11) Stack filters, presets and more
This goes along with the layers we just talked about. You can make some filter edits on your base photo, then add a new layer and apply a preset. Then, experiment with adding another layer with another preset on it, or just a few filters. You can stack many layers to get creative in Luminar and achieve the look you are going for.
For me, the key here is to manage the opacity of each layer (and that’s another advantage of Layers in Luminar). At the default 100% opacity, any edits on a new layer may appear to be too much, but you can easily slide the opacity lower and end up with something of beauty. Or take advantage of layer masking to brush in the edits on that layer selectively.
12) Use filter masks
Filter masking is one of those really cool little features of Luminar that make you wonder how you ever got by without it. Basically, you can just mask in a filter to a portion of a photo (like using a layer mask), but without adding a new layer. And you can do it with multiple filters all on the same layer. It’s quick and easy and so effective. Literally I use this on just about every photo. There is always something that looks great in one part of a photo, but not so great in another. Just mask that filter in selectively and move along. It's quick and painless and this innovation of Luminar is probably one of my most-used.
13) Do some black and white
I will admit that I am a big color guy at heart, but as my style and tastes have evolved I have grown to really love monochrome images. While I used to spend my time doing this in Tonality, I now do it in Luminar and get great results. Monochrome photography is a great way to focus on the composition and lines in a photo, instead of getting distracted by big, bold colors (which I admit, happens to me a lot - I love big color). It’s like a purified version of photography, and Luminar makes it easy. Literally just a few clicks and a few slider adjustments, and you have a winner!
I even put together a custom workspace for monochromes, entitled Monochrome Magic, that you can get here. As you can see in the screenshot below, even a stunning, colorful sunset can look beautiful in black and white.
I also did a video a while back showing how I edit monochromes in Luminar, if you want to take a look:
14) Use the gradient and radial masks
These two masks are very useful and getting accustomed to using them will really help your editing. I generally use them when I am doing something a little unique - adding a new sky (see that earlier video about sky replacement), converting day to night (yes, you can do that in Luminar, too - see video below), adding a sunflare or adding some light, for example. But they can be used in a lot of different ways and give you some amazing flexibility for getting creative.
Here's the video showing how I change day to night, using both gradient and radial masks:
15) Experiment with blend modes
I will admit that using blend modes is not something I do a lot of, but whenever I do, I get unexpected results - and I mean that in a good way. Any outcome I get with them is completely unpredictable, and sometimes that causes me to change how I am editing and thinking about a photo. It’s a good way to have your brain get forced to think differently, and I believe that is a positive when it comes to creative endeavors such as these. Otherwise, we tend to be creatures of habit, which isn't exactly the goal in artistic pursuits, right?
16) Watch some videos
Yes, this sounds like a shameless plug, though it’s not intended that way. I do have a LOT of Luminar videos available on YouTube, and of course there are a bunch on the Macphun site, too. But even if you don’t watch mine, watch someone’s videos. More and more content is coming online about Luminar as it continues to grow, and you can always learn something from somebody (and I believe video is the best way to do this sort of instruction).

Look at all this stuff - check it out and let me know if it helps!
17) Join the Macphun FB group
I never really expected to find myself saying "Hey, go join a Facebook group!", but I will admit that this one is really good. Any of you reading this that are already in the Macphun Facebook Group can likely attest to how helpful it is to be a member of. In addition to seeing great shots from Luminar users around the world, you can solicit and receive constructive feedback, get inspiration from others and make like-minded virtual friends from around the world. It’s truly a great group and one of the things that keeps me looking at Facebook every day. I really enjoy it, and that's not something I say about most things on Facebook these days! ;-)
There is also a new Community Forum that Macphun/Skylum created wherein you can read about support topics, chime in and just keep up to date on the apps and general support-related questions. You can find that site right here.
18) Think about your desired outcome
Call this pre-visualization, and get into your "art brain". Think about what you want your shot to look like, assuming you are getting into creative edits. Don’t just go on auto-pilot but think ahead. Get creative and think outside the box. Maybe come up with a different and unique look in your mind, and then go figure out how to get it done. Luminar has a TON of power, and all it takes is to get in there and experiment. Pretty much the only limitation is our own imagination.
19) Try to replicate a look you have seen in another photographer’s work
I have tried this many times over the years, and it’s always a good exercise. Find a photo from someone else that you like, and then see if you can edit a similarly-composed (or similar subject) photo of yours to achieve a similar final result. No, you don’t want to just carbon copy someone else’s style, but as a learning exercise it is great to try and sleuth out how someone did something, and of course you will learn in the process (which is really the point). Of course you have no idea what their starting point looks like, but since you know the endpoint you can take something of a similar subject of your own and aim it in that direction. Regardless of the outcome, this is about experimentation and learning the tools.
20) Process the same photo multiple ways
This one really gets the brain in gear, and fast. Take one of your shots that you have already edited, and then go edit it in a completely different manner. Then do it again and again. I have done this many times, and it really does cause the brain to stretch as you are reaching for new and creative ideas. There’s something about taking the same photo and making various looks with it that really works for me. Try for 5 totally different looks if you can. It’s fun.
I wrote an article about this idea using Aurora HDR a while ago, which you can get to by clicking on the photo below. Yes, that was Aurora HDR and not Luminar, but the idea of it is the same. It caused me to get creative and learn the tools, and that is always a good thing for an artist to do.

21) Take a lot of different types of photos
While this is also a good exercise for getting better at taking photos, I also believe it helps you get better at editing. For example, if you always take photos of the same subjects, then it’s likely you fall into the habit of editing them in a similar way…which means you are not exploring all the power and versatility of Luminar. But if you take photos of a lot of different subjects, you sort of force yourself to change up how you edit things, and this will get you using a lot of different tools in Luminar. Basically, I am trying to encourage you to experiment, which is how I learn new stuff (and I am assuming the same goes for you).
If you take cityscapes, try some portraits. If you take landscapes, try some macro. If you shoot portraits, get outside and shoot a landscape. If you shoot florals, go shoot architecture. You get the idea. Expand beyond your comfort zone, which in addition to helping you better understand the editing power of Luminar, will also help you better learn your camera. It's really a great exercise. Plus, it means you get to go photograph something, and isn't that always fun?
Well that’s it my friends - 21 tips for getting the most out of Luminar. Did any of this help? What did I miss?
Luminar truly is an incredible product and taking the time to learn how to use many of the powerful tools that it contains will help you grow your post-processing skill set. You will find yourself coming up with new and creative ideas, and then finding a way to implement them on your images.
If you have any questions, please leave a comment below, or use the Contact Form to send me a message. I always do my best to assist, though of course I don't know everything. I'm always trying to learn, too. That's part of what makes this creative, photographic life so interesting. There is always something new to investigate.
Thanks for stopping by today!

Luminar Tip: How to Create a Sun Flare
Did you know you can fake a sun flare in Luminar? You can, and it's quick and easy. Follow along!
Have you seen photos with a sun flare in them? You know, some warm golden light coming in from a corner of the shot? Well, did you know you can simulate that look in Luminar? It's true! And, it's rather easy.
In this video I show how to fake a sun flare in Luminar, creating a new and entirely different look in your photos. Enjoy and let me know if you have any questions!
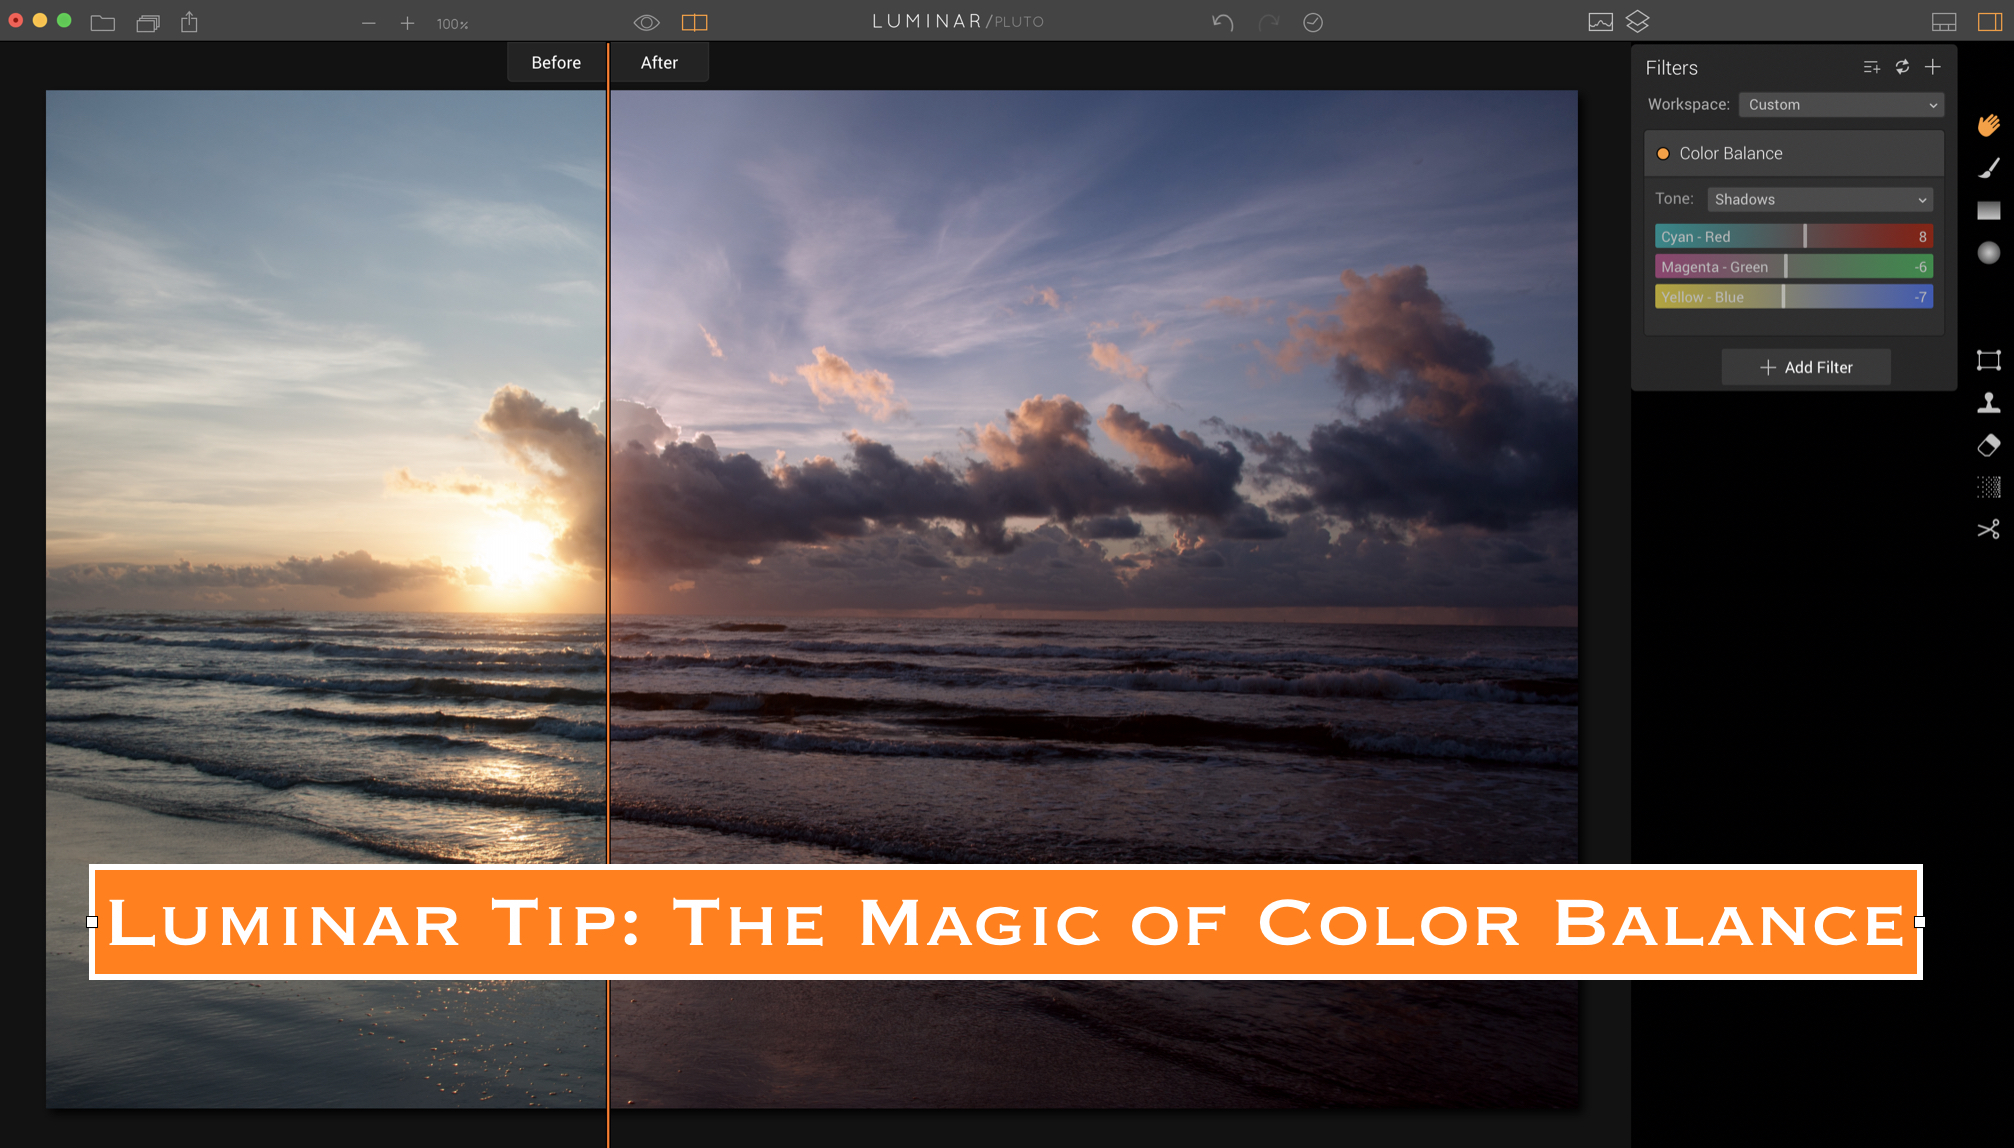
Luminar Tip: The Magic of Color Balance
The Color Balance Filter in Luminar is very powerful yet simple to use. Follow along as I show you two photos that I use it on and see the significant changes it makes!
Here's my latest video about Luminar, demonstrating how to use the Color Balance filter.
I use this filter a lot. It allows you to quickly and easily change color tones in a photo. There are three color sliders and then three drop-down selections for tones (Shadows, Midtones, Highlights). You simply choose which section of the tones you want to adjust, and then slide the color sliders accordingly.
In any given photo, I may adjust only one section of tones or I might adjust all three. It just depends on the photo and the outcome of my experiments with it. I feel like that is what a lot of this comes down to: experimentation. There is no formula for using this filter. Just move things around until they are pleasing to your eye. It's very simply yet powerful.
Take a look at the video and let me know if you have any questions!

Coupon Codes for Macphun Apps
Now Available: Coupon Codes for Macphun apps! Save $10 on either Luminar or Aurora HDR!
Save money on these great photo editing apps!
Hi everyone, as you can tell from all the Macphun-related content here on my blog, I absolutely adore their apps. I have been using them exclusively for a long time now and continue to be impressed and inspired each time I open them up. They are intuitive yet powerful, simple yet highly effective. They just work.
I am happy to announce that there are now coupon codes available for your purchase of any of the apps, in particular Luminar and Aurora HDR. These coupon codes save you $10 on your purchase, so it’s well worth it.
The coupon code is JIMNIX which you can enter during checkout at the Macphun site. It will automatically remove the $10 once you apply it. See screenshots below.
Luminar sells for $69 normally, so you can get it for $59 using the coupon code JIMNIX.
Aurora HDR sells for $99 normally, so you can get it for $89 using the coupon code JIMNIX.


Click here to head over and check out Luminar.
Click here to head over and check out Aurora HDR, and note there is also a training video you can pick up if you are interested.
Don’t forget to follow me on YouTube where I post new videos weekly showing how I use these apps to edit my photos. I have around 50 videos out there now, so there is a lot to watch!

Here is the checkout page for Luminar...

Here is the checkout page for Aurora HDR which also shows the video training...

Luminar Tip: Combining Textures with Presets
In this new video, I show how I combine textures and presets to customize the look of my photo. It's a fun and creative experiment and I think the results speak for themselves. Take a look!
Sometimes a texture by itself just isn't enough...
I admit that I have become a huge fan of presets over the last year or so. Prior to that, I never used them, regardless of which product I was using. I always wanted to build my photo from the ground up. But first in Aurora HDR and then in Luminar, I have really integrated using presets into my workflow on literally every photo.
If you are interested, you can find all my preset packs right here.
Historically, when I would add a texture to a photo I would just add it, make a couple of minor adjustments, and call it "done". But my love of presets has crept over into my use of textures and has resulted in me starting to combine them both on my textured images. I believe the results are quite nice, but then again I'm a little biased. :-)
Here's my latest video showing how I use both textures and presets to edit an image. Take a look and let me know if you have any questions. Thanks!

Luminar Workflow: Editing a Nighttime HDR
Here's a new video about editing an HDR photo in Luminar. I build it in Aurora HDR and then take it over to Luminar for all the stylizing. Enjoy!
Here's my latest video - taking a nighttime HDR and editing it in Luminar!
I love Aurora HDR and still use it all the time for creating and editing my HDR photos. But with my current love affair with Luminar, I thought it would be fun to take the base HDR crafted in Aurora and then move it to Luminar to do all the stylistic edits.
This was shot in London in the evening, and the city lights created a really horrible yellow/green sort of color cast across the photo. With Luminar I was able to change all that and get a much more beautiful photo out of the process. Check it out and let me know if you have questions!

5 Minute HDR - a new series on YouTube
I created a new series on my YouTube channel called "5 Minute HDR". Yes, it shows how I create a beautiful HDR image in 5 minutes or less using Aurora HDR. Seem impossible? It's not. Read on and then watch the videos!
5 Minute HDR - create a beautiful HDR photo in 5 minutes or less, with Aurora HDR!
A few weeks ago, I was editing a photo with Aurora HDR. It was a pretty simple set-up and a pretty simple shot. It took me less than 5 minutes, including the experimentation that I always go through, which includes checking out multiple Presets and more.
After working through my processing steps, I realized that this might be helpful to others. I have heard people say for years that HDR is too hard, or too complicated, or that they could never learn to do it.
Wrong.
In truth, it’s very easy. Believe me when I say that I felt the same way, years ago. I too thought it was hard, and confusing, and complicated. But once you learn a few things, you will get your arms around it easily.
Now, every image is not a 5 minute thing. There are definitely some that take me quite a while, and there are even times when I give up on an image and decide to return to it at a later date. It happens. It can be frustrating, but just move on and accomplish something else.
Generally speaking, I don’t feel like HDR has to be complicated or difficult. It just requires a little practice, that’s all. You just have to get comfortable using software to merge and edit the shots, and then you are all set.
Aurora HDR from Macphun makes all of this extremely straightforward. In the old days, I had to use several products to accomplish everything I needed to do to an image. And yes, that made it a bit more complicated and time-consuming. I could never have done this using my old tools, because of all the back-and-forth between various programs.
Now I use Aurora HDR to combine the image, add presets or other adjustments (even textures), apply any noise reduction, and that’s it. I’m done. That's why I switched to Aurora. It simplifies my workflow and makes my photographic life easier. You can read about that here.
So, I did what I have been doing a lot of lately, and that is recording a video. I called it “5 Minute HDR” and I think I will turn this into a series on YouTube (kind of like my other series there, called “Making the photograph”). This series will be about showing how to quickly merge and edit an HDR image and still like the result.
If you like learning about photography and how I use Aurora HDR to post-process my photos, subscribe to me on YouTube and catch all my videos about it!
In this series, I plan to show you how I work through an image quickly and create something that I am proud of - all in under 5 minutes each time. It’s going to be fun for me, and I hope it will be helpful for anyone that takes the time to watch.
That’s the other complaint I have heard about HDR - the process is too long. Well, I think we all can spare 5 minutes to edit a photo, right? And before that, you can spare 5 minutes to watch my video, RIGHT? ;-)
I hope you enjoy this series, and please let me know if you have any questions.
Thanks for following along! Here are the two videos in the series so far - enjoy! More coming!

Catch my Aurora HDR webinars!
I am hosting a series of webinars with Macphun, showing how I use Aurora HDR to process my images. Click in for details and I hope to see you there!
As you know from reading about it here on the blog, I switched over to processing all of my photos in Aurora HDR from Macphun. Here's the full story. It's just the most capable piece of software I have ever used, and I absolutely love it.
Since that time, I have been working with Macphun a lot, writing for their blog and creating their HDR tutorial. It's been great.
Now, I am taking the next step and hosting some webinars with them, starting this week. I will be demonstrating how I use Aurora HDR to process my images, and including any tips and tricks that I use to do so. It should be great fun.
You can sign up and get the details here: https://aurorahdr.com/education
Just scroll down until you see the Webinar section (screenshot below) and sign up - easy! See you there! Let me know if you have any questions!
