
Introducing the Urban Distress Texture Pack
Introducing the Urban Distress Texture Pack - 10 versatile and beautiful textures you can use to create your own masterpieces! Check it out!
My first texture/overlay pack - Urban Distress! Check it out!
Over the last couple of years, I have really started to embrace using textures as a component in my photographs. They can add an interesting and unique look to a photo, and they offer the option of interpreting a scene in an entirely new and artistic way. It's fun to experiment with textures and completely change the look of a photo.
During my travels I have been collecting textures whenever I find something that looks interesting. I have been using these on my photos for a while now, testing them out with different styles of photos and distilling my collection down to the 10 that I consider the very best and most flexible and adaptable to various types of photos - my personal favorites, in other words. They are now all available in this single pack, Urban Distress.
I call this pack Urban Distress because they were all captured in various urban environments, and all show some signs of wear, grunge or distress. However, they look good on all sorts of photographs, even landscapes and nature photos. In fact, you could use them on portraits too (just be sure to remove it from the person). So, don’t let the title of the pack make you think it is only for urban shots. It’s really functional for a wide variety of photographs. You can see many examples below.
Thanks for looking and let me know if you have any questions!
Urban Distress Texture Pack = $10.00
This collection of 10 beautiful, hand-crafted textures will add color and artistic effect to your photos. They are all approximately 6000 x 4000 pixels and are each about 10MB in size. Also, they are all in JPG format for ease of use. They come as a digital download in a single ZIP file, which is about 100MB in size (make sure you have good wifi!). Double click to open it once it is downloaded.
Textures included (see image below): Faded yellow paint, Green grunge, Grungy wall, Mossy rock, Mossy stone, Rust, Rusty stone, Stucco, Weather cement, Yellow grunge
Highlights:
10 image files in JPG format
All files are approximately 6000 x 4000 pixels and are in landscape orientation
Each file is approximately 10MB in size
It sells for $10. Interested and ready to buy? Just visit my store. Thank you!
Screenshots and Sample Images
Here are a bunch of screenshots so you can see these textures in action. These show a Before/After comparison in Luminar by Macphun (my preferred editor, although you can use these in any image editor that allows for layers, such as Photoshop) as well as the final image. Click any photo to enlarge and view in a lightbox. Thanks for looking!
Hopefully these images give you a good idea just how versatile these textures really are. I use them on a lot of my travel photos, taken in various light conditions, and love how they look.
Tips for Applying Textures to Photos
Here are some tips on how I use textures in my photos (I do all my editing in Luminar by Macphun, but you can apply a texture in any editing program that allows you to create new layers):
Once the new texture layer is applied, I reduce the opacity to about 25% to start. This gives me plenty of visibility of the image underneath, and I can always go back and change the opacity if I want to.
Consider applying additional filters/effects on a new layer after you have added the texture. I generally experiment with color tones, contrast, details and light once the texture layer is applied.
Sometimes I will take an already-edited photo and apply a texture, and sometime I will apply a texture before any edits. Experiment and see what you come up with.
If you don’t like the color of the texture, you can use Color Balance, Color Temperature, Curves and other filters (in Luminar) to change the general color of it, so it more closely resembles the look you are trying to achieve.
Consider using the eraser to remove the texture at a reduced opacity from some parts of the image. Sometimes it looks better when an already-busy section of a photo has a lower opacity of the texture, leaving the higher-opacity parts for sections of the photo that are plain, such as an empty sky.
You can stack multiple textures for even more creative results.
Experiment with blend modes to see how changing them can impact the look of the photo. You can get some really varied looks just by doing this. The two I use most are Normal and Overlay, but each photo is different and it is worth experimenting to see how they impact the shot.
Have fun!
If you would like to see a video of me applying a texture in Luminar, here is one I created for Macphun: https://macphun.com/luminar/video-tutorials/textures-photos-add-luminar
Fine print:
Jim Nix/JimNix.com retains full ownership rights to these textures under any and all applicable copyright and intellectual property laws. By purchasing these packs you agree to this.
The purchase of these textures is for personal or commercial photographic purposes. By purchasing you agree that you will not resell, redistribute, bundle or otherwise profit from these textures in any way other than as a composite layer within your own photographic or graphic design work.
You do have the right to modify these textures while using them in your own creations.
Sharing of these files is strictly prohibited.

Street art in Florence
I found myself on a quest while in Florence, Italy - a quest to capture as much of the work by street artist "Blub" as I could find. I discovered 16 works by the artist, so here they are. They all feature either a famous work of art or a famous person (real or imagined), each fitted with a swimming mask. It's a fun diversion from all that other art in the city!
I found myself on a quest while in Florence - looking for street art by someone named "Blub". This is WAY better than Pokemon Go.
I'm a fan of street art (some call it graffiti, or urban art, or a million other things) and find myself photographing it just about everywhere I go. It's always interesting and beautiful. When I was in Florence, I found myself on a bit of a quest, chasing works by the artist known as "Blub".
You see, we spent over a week there, and while the town is amazingly beautiful and full of possibly the best art in the world, you can get "art fatigue" as they call it. You see so many historic and famous works that after a while your brain just wants to melt. Or you need a beer. Or gelato. Yeah, gelato. Florence has the best gelato.
Anyhoo, as I walked around the town I started spotting these works in all sorts of places. Generally they were pictures drawn of a famous person (William Shakespeare, or Santa Claus), or a famous work of art (Mona Lisa), all with a swimming mask on their face. Something about it just got me interested, so I took a photo the first time I saw one.
Then, I saw another one, and another one, and so on. The quest had begun. I ended up capturing the 16 photos you will find here today. And FYI these were all shot with my iPhone. It's always with me, and especially for a quick snap it's hard to beat. And these aren't great shots, just quick snaps of something interesting. I wasn't trying to create art here - it's already art, anyway - but rather just a quick capture of cool street art.
Sadly, in some cases someone had marked on these, or torn them, or otherwise defaced them. I hate when people do that. This is still art and should be treated that way in my opinion. Enjoy it with your eyes, take a photo, and leave it alone people!
So if you find yourself taking a trip to Florence, take a break from the famous art and go on a hunt of a different sort, chasing these also beautiful and interesting works of art, scattered on street corners and tucked away little spots all over the city. It's quite fun and a great diversion from the art browsing you will do in places like The Uffizi.
I sent one of these pics to some friends and told them I was chasing these all over the city, and they said it was like some "high brow" version of Pokemon Go. I don't play that game, but I get the reference and definitely got addicted to this quickly! And it was way more interesting to me.
By the way, I found this artist's Instagram page if you want to follow their work. You can find that right here: https://www.instagram.com/lartesanuotare/
Click any image to embiggen...

How Aurora HDR Pro got me interested in textures
Today I share a quick how-to on applying a texture to a photo in Aurora HDR Pro. It's super easy and quick and a great way to take an other discarded shot and turn it into a work of art. I show you several examples and there's a YouTube video, too!
Adding textures in Aurora HDR Pro
If you read this post, you will know that I am now using Aurora HDR Pro to process a lot of photos - and not just my HDRs. I'm processing a TON of single exposures in Aurora and find it's not only fun but very capable. It's given me a new creative outlet and I'm really enjoying it.
If you want to see me give a quick tour of Aurora HDR Pro, you can find that video here (And yes, I'm now adding videos to YouTube - you can find my channel here).
So today, I am back with another video and something that is pretty new to me: adding textures to photos. Aurora HDR Pro allows you to very easily create a new layer and add a texture, so I thought I would test it out and see how I like it.
It turns out that I like it quite a lot!
You see, I've never been a texture guy so to speak. While I can appreciate them and find them usually pleasing to the eye, I never had an interest in adding them to my photos. But now that I have been experimenting with them in Aurora HDR Pro, I have a new appreciation for how it can impact a photo in a very positive way. Not to mention, you can add drama to an otherwise dull photo, or just completely change the look of something. You could also convert a "throwaway" shot into something that's worth keeping. The possibilities are endless, really.
While you can watch the video to get all the insight I have to offer (and it's just below), I have a couple of extra shots that I adjusted and will share here on the blog. And just to be clear, all of these photos are single exposures, not HDRs. Have a look and let me know your thoughts!
Photo #1 - Sunrise in Abiquiu, New Mexico
This is the photo that I used in the video. It was a stunning sunrise with some great color and in my opinion, just a beautiful landscape. I took the photo into Aurora HDR Pro and gave it a little more punch, bringing up the colors a bit primarily (and shifting them too), which was easily done with the Color Toning panel on the side menu in Aurora. Here's what I would consider a final product, as I find this image very pleasing to my eye.
However, I also wanted to experiment with a texture, so that was the next step. As you can see in the video, it was very easy to add a new layer, choose the texture, and then test out the different overlays to see what worked best for this image. I was going for an "Old West" look, so my texture was a crumply piece of paper. Here's the outcome of that after adding the texture, choosing the Blend Mode, and reducing the opacity (which takes mere seconds, really):
I was able to quickly and easily achieve my desired outcome, which was an "Old West" sort of vintage print. Just for fun, I did another shot from that morning, which is below. It was just a lonely road with a gorgeous sky, so I blended in a texture on this one as well. Quick and easy!
Photo #2: Route 66 sign
Now here's one that's a little different. This is an old sign I encountered in New Mexico. I love signs and find myself taking a lot of shots of them when I travel. Since this one said Route 66 on it, I couldn't really pass that up. :-)
As you can see in the first screenshot, it was pretty much a boring photo. While I like the sign, there was nothing happening in the sky behind it and the brown color of the sign against a basically white background was just begging for some changes. So, I obliged. :-)
Here's a screenshot from Aurora prior to adding the texture so you can get a sense of how this photo started out.
To add the texture, just head over to the Layers panel on the upper right side of the screen. Hit the bluish-green plus sign + and it creates a new layer. Give it a name (I used the super-original "texture"), and then click on the little drop down menu which is to the right of the Opacity gauge for that layer. Choose "Source Image" and then "Custom Texture". It adds the texture to the layer. Now you just experiment with the blend mode (it's the box to the left of Opacity that currently shows "Hard Light" - there are several choices - just experiment to see what works best for you). You choose your blend mode, adjust the opacity to suit your taste, and you're done. Easy, right?
And here's a screenshot of it while I am working on the texture in Aurora (you can see I chose Hard Light and reduced the opacity down to 54%):
In this case I added another crumpled paper texture (I seem to like them), though this one also had tea or coffee stains on it. So, slightly different than the last texture. As you can see below, it ended up looking a bit like crumpled metal to my eyes, so that seemed like a good fit for a metal sign. Then I made a few adjustments and here's the output:
Photo #3: The Loop 360 Bridge
And here's the last example for you. This is the Loop 360 Bridge in Austin, formally known as The Pennybacker Bridge. It's a landmark here in town, and at every sunset you will find people up there taking in the view. It's a beautiful structure and one that I photograph often, since I only live a few miles away from it.
Now this is a really old photo, going back 5 or 6 years I think. It was just a basic single exposure and that's why I chose it. There wasn't anything interesting or different about it - it's the same photo about a billion other folks have taken. I wanted to try a texture here and see what sort of creation I could come up with it.
Here's a screenshot from Aurora prior to applying the texture (I did make some minor color adjustments in Aurora, which the below screenshot already include):
That photo was nice-enough looking, but not fun, creative or different in any way. As seems to be my pattern thus far, I used a different paper texture on this one:
This texture is not the crumpled type like in the previous examples, but more like a piece of construction paper. Maybe I'm branching out a bit? :-)
After applying the texture, I also made some additional color adjustments, both in Aurora and back in Lightroom. I wanted to give it a little bit of a historical feel, sort of like those old colorized postcards from yesteryear. Know what I mean?
Well anyways, here is the final result:
I'm not sure if "vintage colorized postcard" is the most accurate description, but hopefully you know what I am talking about here. The bottom line is that I took a pretty basic photo of a common subject here in Austin, and turned it into something unlike what you normally see from this spot, in just a few minutes. That's the power of textures, and Aurora HDR Pro makes it easy.
Summary
So how did Aurora HDR Pro convert me from a "not interested in textures" kind of photographer into a "hey, I like this stuff" kind of photographer? Here's how:
- Aurora made it super quick to add a texture to any photo. It literally can be done in under a minute.
- Aurora made it super easy to add a texture to any photo. Literally just a couple of clicks and you are in business.
- Aurora made me realize that what I used to consider throwaway shots can be turned into art and are worth saving.
The only problem? Now I find myself with two additional tasks added to my photographic "to do" list:
- I am digging through my archives and trying out textures on everything! I don't really have enough free time to do all this stuff, but who cares? It's fun!
- I am planning on taking photos of walls, papers, rocks, fences - you name it - all in the name of creating my own textures to start employing on this vast trove of discarded photos I have accumulated over the years.
Oh well, at least I won't run out of things to do, will I? Lots of processing fun ahead! :-)
Thanks for checking this out, and let me know if you have any questions!
If you are interested in purchasing a copy of this software, click the banner image below and you will be redirected to the Aurora HDR Pro website. You can use the code JIMNIX to save 10% on your order!
Quotas, epiphanies, and advice from Dad
Today's post is an essay about goal-setting and getting caught up in the goals for the sake of achieving them. I lost my creative direction earlier this year, but I have found it again and am back on track. Oh, and I had an epiphany this summer that set it all in motion. Read on and let me know your thoughts!
I started out this year with a lengthy list of goals, one of which was to significantly increase the amount of photos that I have published. I think that it was a good idea to put a goal out there for myself, because no one can buy a print or license a photo if it is just sitting in my Lightroom library collecting virtual dust. And these photos don’t just make themselves available. It requires me to do something, because when you shoot RAW, the captured files don’t exactly mirror reality.
However, I have to admit that I got sidetracked along the way and lost focus (photographic pun only slightly intended).
Let me explain.
Quotas can be helpful...
Having spent the better part of my corporate career in what is generally called “sales”, I am no stranger to having a quota. I’ve carried one around at work for the better part of twenty-five years, and it’s just a part of work to me. I don’t get stressed about it - I just do the things that need to be done, and try to do them well, and try to help my customers solve their problems. I assume things will sort themselves out in the end, and they usually do.
So when this year started, and I was sitting at just under 2300 photos published (I use my Flickr account as the basis for my numbers), I realized that getting more of my work published would theoretically give me more opportunity to earn some sort of living from my photography. It makes sense that the more things you have available, the more likely you are to find someone interested in at least one of them.
I still believe that to be true.
...but quotas can be dangerous to the creation process.
However, I found myself getting caught up in how many photos I had processed each week, and how many I still had to go to reach my goal, and so forth. If one blog entry had 10 photos, then I figured I should have 12 photos for the next one. If I had a blog entry with 17 photos, then I should follow that with 20 photos on the next post. More is better, right? That’s the American way, Jim - produce, produce, produce!
Wrong.
I got caught up in the achievement of the goal itself (just focusing on the numbers), and lost sight of the reason for having the goal in the first place, which was to create more photographic art and make it available. I got caught up in making my (self-imposed) quota. It became a numbers game for me. All that mattered were the numbers of photos I created.
And that’s a crying shame, because it became “work” instead of “art”.
I would actually be proud of how many photos I would take on a trip. Instead of thinking "wow, I got a couple of real beauties", I would think, "man this is awesome, I took 2500 photos this week" or something like that. It almost didn't matter how good the photos were, just that there were a lot of them. Isn't that terrible?
Art should be enjoyable
This IS art, and as such it should be an enjoyable thing for all parties involved: enjoyment for the artist during the process of creation (from preparing to shoot, to pressing the shutter, to post-processing), and enjoyment by the viewer when they view it. While I have no control over the viewer’s reaction, I certainly can do things to ensure that I enjoy the creative process. And I should enjoy it, because it fills my soul. I love this stuff!
And the first thing you can do to ensure you enjoy the process of creation? Take your time, experiment, learn something new, and immerse yourself in it. Guess what else I figured out? When you are enjoying the creation process, you are more likely to create compelling images. I was completely missing that point. I got away from the enjoyment, and in many ways it became “my job” to crank out more photos. It became work. It was all about the quantity and not the quality. I was in a hurry. It was a chore.
Trying to force creativity doesn’t work
So I made a change, and have been operating under this change for a while now. I am still working on getting more photos published, but I am not trying to get 10 or more photos on each blog entry. Some may have 10, and some may have 3. Heck some might even be a single photograph (or zero, like today's post). It depends on what it is I am posting about and what I am feeling when I craft these images.
And I have changed things when I go out to shoot, too. I'm not just trying to grab anything and everything. I am slowing down and thinking more about my shots. I came home from my recent Norway and Scotland trip with far fewer photos than on any previous trip to Europe, but I have some shots that I absolutely love.
And I think it is WAY more important to have a few images that you love than to have a million that are ok.
I’m focused less on a quota, and more on creating things that I love. I’m afraid to admit that in some of the pics I have posted this year, I do not love my processing - instead I was posting them because “more is better”. I was just trying to get more stuff published, instead of publishing things that I loved.
And a lot of this comes down to processing choices too. I nearly stopped processing my photos in HDR because it takes longer to go through the HDR creation process than it does for me to make adjustments to a single exposure. But I missed HDR in a big way, and am happy to be processing more of my recent work in HDR. It's fun.
The wisdom of my late Father
So this means that I may be going back to the well, so to speak, and taking some of these photos you have seen here previously and reprocessing them, but with an emphasis on quality this time. I will just have to make time for it, because there are some that would look really fabulous if I came back to them with the idea of crafting a quality image front and center, instead of just rushing through it to get more stuff out the door.
It reminds me of something my dad used to say to me, when I was looking for a shortcut to getting some chore done, presumably so I could get back to doing something I loved. He would say “Son, if you don’t have the time to do it right the first time, when are you going to find the time to do it again?”. Amen to that, Dad, and thanks.
The epiphany in Park City
Much of this thought process occurred this past summer while we were making our way home from our extended stay in Oregon. We were in Park City, UT for a weekend, and walked into a photography gallery there that contained the most amazing work. It was awe-inspiring, and it reminded me of how I felt when I first started seeing (and creating) HDR photos. I was inspired again, and decided there and then that chasing numbers was not going to cut it anymore. I wanted to create beautiful images to the best of my ability, not rush around just getting a large quantity of average stuff out there. I was nearing burnout, anyways.
To be clear, I am not saying that HDR is the only way to do things, or that everything I do will be HDR - I simply want to take my time, enjoy the process, and create stuff I love. It just so happens that HDR is something that I still love.
This thought process is also partly responsible for me moving back into a full frame camera system - having recently bought the Sony A7II and sold all my Olympus gear. Obviously there is nothing wrong with Olympus, but I just felt the need to return to full frame. There is just something about it, but again that’s a discussion for another time.
Looking ahead
I am still cranking out images - though at a slower pace these days. Some of my recent posts have been multiple images and some have been just a few, but either way, they are images that I took my time on, and I feel better about it - and I am only sharing it here if I love it.
Oh, and about my goals for the year? Yeah, I achieved them many months ago. I am sitting at nearly 4400 images on Flickr, and just about to hit 3000 on my portfolio site at SmugMug. I already upped them once about mid-year and then hit those targets too. Like I said, I was pretty focused on the numbers.
But I’m done with setting goals. I made my goals for the year, and then over-achieved my stretch goals too. I am getting back to the art of it all, the love of the creative process and the crafting of things that I am proud of. Now I am going to take my time and share images that I love with you here. I hope you enjoy them, and I am always open to feedback.
Thanks for listening.
p.s. Kind of funny that I talked so much about creating a lot of images, and I didn't include any here, huh? Well, I'm off to process some new images - but just a couple. No sense in rushing things. :-)

Revealing the artist within
I love the Impressionists, and enjoy their work immensely. When Topaz Labs created Impression - a software product that helps you convert your photos to digital paintings in a very realistic way - I was very intrigued. Well I have used it for months now, and have found that it is having a profound impact on my photography. Today's post is all about that, and of course there are a BUNCH of my digital paintings included for your viewing pleasure. Hop on in!
Topaz Impression is changing my photography
sunrise in Austin, TX
golden hour along a canal in copenhagen, denmark
I’ve been a fan of Impressionist paintings for a long time. I have no idea when I first came across them and decided that I liked them, but it’s been a while. There’s just something about them that really speaks to the artist in me.
I love the play of light, the bold use of color, and their use of simple compositions to draw the viewer in. I have no formal education in their works (and therefore don’t pretend to know much, honestly) but I do find them beautiful and interesting, and I am always drawn to them at museums. They seem to be full of feeling.
“If you hear a voice within you say, ‘You cannot paint,’ then by all means paint, and that voice will be silenced.” — Vincent van Gogh
But I can't paint worth a damn, so I take photos instead. I'm ok at that stuff. :-)
Les deux magots, a famous cafe in paris
leadenhall market in london - and yes, this place was used for parts of diagon alley in the harry potter movies
an interesting shop along the royal mile in edinburgh, scotland
Even though I am a fan (and frequent practitioner) of HDR photography - which is typically known for showing a lot of detail in a photo - I love the way that Impressionism actually obscures the details and makes you appreciate the larger scene itself.
It’s brilliant, really. That’s the purpose of art anyways, right? It honestly makes me want to continue to evolve my style of photography. It makes me want to be a better photographer. Studying these masterpieces just really gets me motivated.
“Every artist dips his brush in his own soul, and paints his own nature into his pictures.” — Henry Ward Beecher
a street just off grand place in brussels, belgium
blue hour at notre dame in paris
an alley along a back street in bratislava, slovakia - just loved that red door!
I’ve done the “heavy-handed HDR” thing before (and now and then I still do, because I feel like some scenes just beg for it), and I still like it at times, but more and more I am moving in the other direction. Where am I headed? I haven’t fully figured that out just yet.
I assume everyone that is involved in some artistic pursuit continually goes through the same cycle of creating, continuing to learn, and applying those learnings in new ways. It’s something I have been doing for some time now, and frankly - I love it. I love experimenting with new styles and new processing options, and seeing where it takes me. I love experimenting with new ways of shooting too – trying new composition ideas, new lenses, and generally just mixing things up and keeping it fluid.
shakespeare & co bookstore in paris
sunrise in the temple bar district in dublin, ireland
I guess I feel like I rode a particular horse about as far as it wanted to go (or at least as far as we wanted to go together), and now I am trying out lots of other horses to see which one is most compatible with me. (Yes, I am from Texas. No I do not own a horse - it just seemed to be a fitting description.) I seem to be writing a lot about creativity, change and experimentation over the last 6 months or so. I’m obviously thinking about it a lot, and going through a bit as well.
Am I turning my back on HDR photography? No, I don’t think so. I still love it, and still do HDR a fair amount. It’s just that I am a bit more diversified now. I guess I want to do more than one thing with my art.
blue hour at the bay bridge in san francisco
a boulangerie in montpellier, france
It’s very much like the blog itself. I’ve changed a lot here over the last year or so. The first few years I posted a single photo each day, about 5-6 times per week. Now I do more long-form posts like this one, plus I include a LOT more images, and write about more than just the image at hand. And, I now post about 2 times per week, and sometimes 3 times. So fewer posts, but longer posts, and more images. It’s been great to change things up - I think I needed it.
It certainly keeps it more interesting for me - and hopefully for you.
sunset in portland, or along the willamette river
shopping in galleries vivienne - paris
the natural history museum in london - such a heaven for photography!
But anyways, like the Impressionists (ok, I’m not actually trying to compare myself to them, to be clear), I am finding that it’s better at times to obscure instead of reveal, and that it makes for a more interesting image. If you can’t see EVERY SINGLE THING in an image, it makes you look at it a little deeper, and a little longer, and I think you then start to fill in the blanks in your head a little bit. It’s more interesting. More engaging.
So in an effort to get in touch with the elusive artist inside of me (and I believe we all have that little spark in there somewhere), I have been converting some of my photos to digital paintings, using Topaz Impression. If you follow me on Flickr, you have probably seen me post quite a few of these in recent weeks. I love just sitting around with an old photo, and jacking around with it to see what new thing I can create from it. It’s a good exercise for the creative right side of my brain. Way better than surfing Facebook. :-)
And that brings me to today’s post. These are just some of my recent faves that have gone through Topaz Impression and come out on the other side looking all artsy. It’s quite fun, and I highly recommend it. It’s a great creative exercise, even if all it really is is just moving some sliders around. It’s not really the physical act for me as much as it is the mental one. It makes you think differently, that’s for sure.
st. pancras international station in london - where you can catch the train to paris!
a store in brussels, belgium - i could not resist taking this shot!
before sunrise in grand place, the beautiful town square in brussels, belgium
Admittedly, it’s not for everyone (and I’ve had people tell me that) but it is for me, part of the time and at this stage of my journey, and I love using it as a creative outlet. It forces me to look at things differently than I normally do, and that’s a way to grow and change. That’s a way to improve. And really, that’s what I am trying to do - improve.
“Creativity is allowing yourself to make mistakes. Art is knowing which ones to keep.” - Scott Adams
And just to clarify - because the name Impression puts a certain idea in your head - you can create ALL SORTS of art using Topaz Impression. I tend to stick with the Impressionists most of the time because that is my artistic leaning, but you can do Modern Art, Pencil Sketches, Charcoal and more. It’s incredibly versatile. You can read about it on the Topaz Labs website, or read my review here on the site.
So if you are looking for a way to change things up and explore your creativity, then Topaz Impression might just be what you need. It’s certainly made a difference for me!
sunrise in las vegas
a cafe along rue du bouchers in brussels, belgium
sunset under the millennium bridge in london - what a great sunset that was!
********************************************************************************************************
Note: I am an Affiliate with Topaz Labs, the makers of Topaz Impression and many other great software titles (such as the well-known Topaz Adjust). You can use the discount code NOMADICPURSUITS and get 15% off ANYTHING you order on their site. If you use that code, I get a small commission which I reinvest in the ongoing maintenance of this site. If interested you can follow this link.
But please note that this is NOT a sponsored post. Topaz Labs did not ask me to write this, and did not compensate me for doing so. I wrote and shared this simply because I love the product, and it's making me a better photographer, and I thought some of you would be interested in my thoughts on it. Thank you for stopping by!
First impressions of Topaz Impression
Today I share some shots I created in the new Topaz Impression - it's a new and exciting (and fun!) way to turn your photos into digital art! I have spent a lot of time with it over the last few days, and have really enjoyed it! Take a peek inside and enjoy, and feel free to let me know your thoughts! And note there is a special offer from Topaz Labs on this product until Sept 30, which is tomorrow!
There's a new product from Topaz Labs - Impression! It's pretty fabulous!
Topaz Labs makes a lot of great plug-ins, and I use them frequently. Lately I have been using Topaz Simplify quite a bit to turn my photos into works of art. Now, Topaz has released Impression, which also can turn photos into art, but it is vastly different.
You can read my full review of Impression here, and my full review of Simplify here.
In short, they are separate products that do different things, though both are about creating art. And I will use both in my workflow because I do get very different results from them.
So I thought that today I would share some of the shots that I processed over the weekend in Impression, to give you an idea what this cool new thing is really all about.
And if you are interested in the product, Topaz is selling it at a 25% discount through Sept 30 (which is tomorrow!) so hurry and grab your copy. Use the code SEPIMPRESSION in the coupon field at checkout and get it for $74.99 instead of the regular price of $99.99!
If you want to check it out, please click this link and read all about it!
(note: I am an affiliate with Topaz Labs, and if you use that link to purchase, I receive a small commission which I will spend on a pony. Actually, I reinvest it in the ongoing costs of running this site and providing free content like this!)
Without further ado, below are photos that I edited in Impression. The first set of 8 is all the same photo, just edited with different styles. I thought that would be a good way to allow you to make a comparison. Then, I just tossed in some other ones for fun!
Thanks and let me know if you have any questions!
(click any photo to embiggen)
A canal and passing boat in Amsterdam
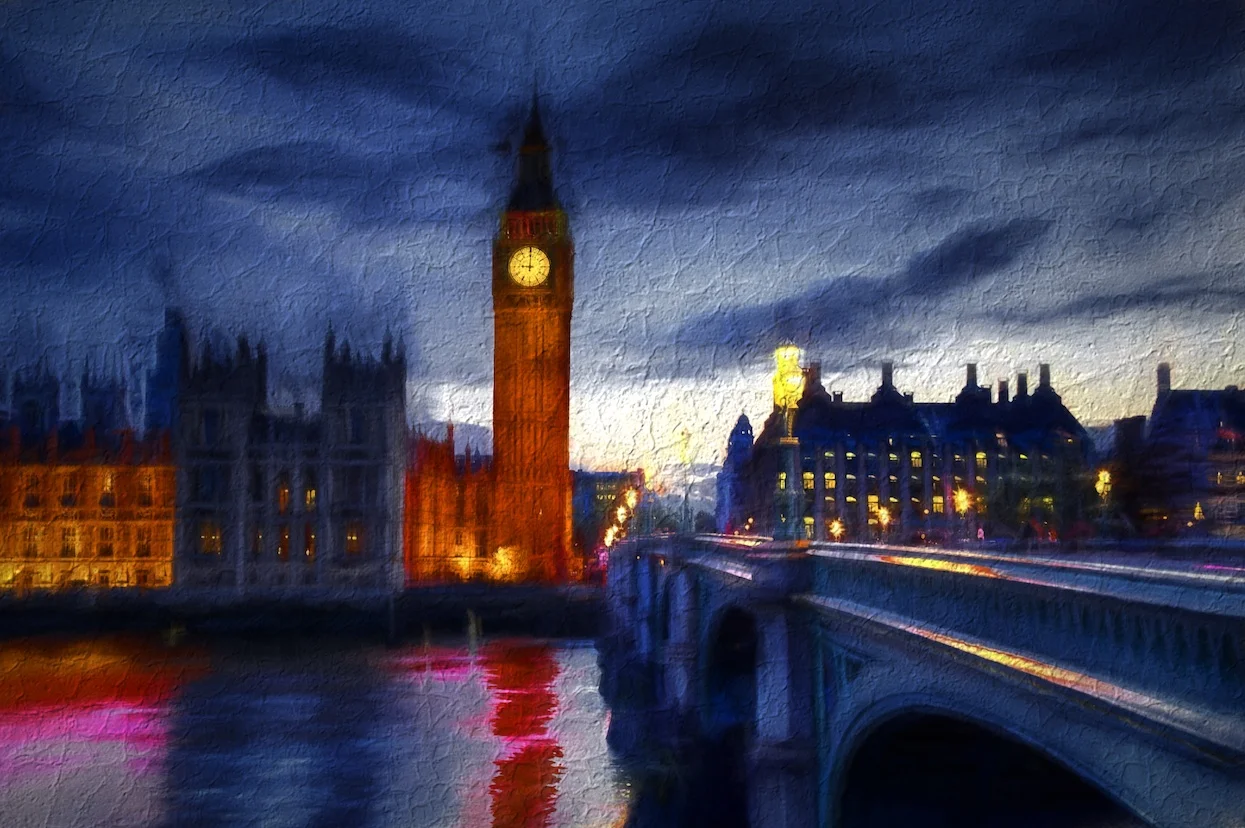
Big Ben, Parliament :-)
NYC skyline
Museum in Glasgow, Scotland
Loop 360 Bridge in Austin, TX
Notre Dame and the Seine in Paris


Painting Montmartre
Montmartre is a beautiful part of Paris, which is itself a very beautiful city. Today's photo tour of Montmartre is done in honor of the great painters who once roamed the streets here. I took a collection of photos and converted them to digital paintings!
Ah, the cafe life in Paris!
This won't exactly be a newsflash, but I just have to say it: Paris is awesome. There, I got that out of the way early in this post! And it is so true. You hear it so often that it's essentially a cliche now. But that is how things become cliches - they are just plain true.
Paris. Is. Awesome.
But Paris is a large city with a lot of things to see and do (and I have a list of places that are great for photography in Paris - hopefully I can return and add more to it!), and there are a lot of different areas to explore. You really never can see it all, but it's sure fun to try!

I loved the long shadows that the building cast on the street in this one.
I was there last summer with the family for about a week (that would be in June 2013, not this most recent summer - time flies!) and while I have shared some shots from there, I haven't really shared that many. And I do not know why.
It's probably that because of my travels, I am frequently shooting, and when it comes time to process photos, I generally think of the recent ones first. With a lot of trips over the course of a year, you can see how I start to forget about things. I get busy and process a few of the new shots, then move on to the next trip.
Here I liked how "Le Ronsard" is clear but most of the rest of the details are much softer.
Today I am going to correct that a slight bit and get these shots from Paris out there for ya! Specifically, I took all of these one afternoon while wandering around the Montmartre section of Paris. The area is best known for Sacre Couer, but today's shots are mostly just street scenes I came across and found interesting enough to shoot.
Interestingly, I had processed all these shots and had them sitting on my desktop, ready to be posted. But whenever it came time to create a blog post, I kept skipping them in favor of other shots from other places.
In other words, I wasn't inspired by the photos that I had taken.
Sitting at cafes in Paris - it's the life! (though I was busy shooting mostly)
So, I did what I have been doing more and more of lately - I decided to get creative. With the exception of two of these (which two should be fairly obvious I hope!), I processed them in Topaz Simplify so that I could turn them into a sort of digital painting. They became works of art, instead of just photographs. They came to life.
And now, I love them. Thank you, Topaz Simplify!
And by the way, I have a full review of Topaz Simplify here. It's a great product, and I am using it a lot now to bring life to an otherwise dull photo. It really gets me thinking creatively.
This is the HDR photo that I used as the basis for the painted version below...and I liked this one as an HDR...
...and this is how it looks "painted". I like it even better now!
And then you know what I realized? Montmartre used to be the home of some of the greatest artists ever - Picasso, van Gogh, Monet and others. I guess that's why I had never been able to get them off of my desktop and onto the blog. Something was keeping them there. Something kept me from sharing the photos. I guess they just needed to be turned into art.
Funny how things work out, isn't it?
Window shopping in Montmartre.
And in case you are the curious type (like me), I figured I should share at least one photo of Sacre Coeur. This was previously shared here a long time ago, so perhaps you missed it. And then of course, below it is the painted version, since I am in an artistic mood today!
I will have to come back and do another post on Sacre Coeur by itself. It's deserving of course, and I do have quite a few pics of it, as you can probably imagine. Sadly, there is a strict rule of no photography inside (and it's got an INCREDIBLE interior), so all my photos are from the outside. But, that's ok, I still love them.
This one has been shared here before. It's an HDR photo of the facade of Sacre Coeur.
And here is the painted version. It's quite a bit more colorful, but that's half the fun with art, right?
I will end with a quote about art that I really like:
No great artist ever sees things as they really are. If he did, he would cease to be an artist.
- Oscar Wilde
THANKS FOR STOPPING BY AND HOPE YOU ENJOYED THE ART!
The ceiling in the Louvre
Just a quick single exposure of the ceiling in one of the rooms of The Louvre museum in Paris. If you ever make it there, be sure and visit the museum and don't forget to look up! There's something beautiful overhead.
On being more selective
On being more selective
Quality vs. quantity
I used to shoot everything, and I mean everything. If I was somewhere and found something even mildly interesting, I would shoot it, then move around and shoot it again, then move and shoot, move and shoot, move and shoot. I would come home with a LOT of photos, and partially judge the success of the outing by how many photos I took. At the time, I was focused on quantity more than quality (sadly).
However, many of these were not interesting photos and they were all shots of the same thing, with slight variances. Although I may have taken a lot of photos, I didn’t necessarily accomplish anything, artistically speaking. I also probably didn’t always know what I was doing. Often, it was spray and pray.
But over the last year and a half (or something like that - this isn’t exactly on my calendar) I have found that I am becoming much more selective about my shots, and when I take one I have something specific in mind (usually). I regularly pass up things I would have shot in the past. I just walk by and don’t bother. It used to bother me if I missed something, but not anymore.
So what happened?
It’s a few things, really. Although I am a fan of taking a lot of photos and sharing lots of your work (and not just your sure winners, as I discussed here), I am thinking more about the end result when I am out shooting. I am asking myself “is this a photo I would want to look at?”. I used to never do that. I just shot, shot, shot.
My tastes have changed as well. I have my go-to subjects that I love: street scenes and cityscapes, architecture, sunrise/sunset/blue hour to name a few. I also love bridges. Everybody loves landscapes (the trick is finding some you want to shoot, that you can actually get to easily enough, then hopefully showing up when the light is perfect).
I have really gotten away from some things I used to aim my camera at: flowers is the first one that comes to mind. I can’t remember the last time I took a photograph of a flower. It’s been ages. Another one is small architectural elements. I used to get shots of little things like that all the time. I don’t anymore. For a while I wanted a macro lens, and I really appreciate a great macro when I see it. I just don’t have any interest in taking them myself anymore. It’s not my thing.
And perhaps more than anything else, the reason for this change is due to my major addiction to my wide angle lens. I just love that thing! And if you have one, you will know that when you look through that thing, it really changes how you look at everything. Now I view almost everything from the perspective of a wide angle shot. It totally changed my photography...hopefully for the better. :-)
The quest for blog material
I think my habits in the past came down to this: I had a deep-rooted need to grow my library, because I needed raw material for the blog. I needed photos to process, so that I had photos to share. I basically wanted and needed to grow my library. If you don’t have new photos to work on and share, what are you going to put on your photo blog, Jim?
But since I was shooting sort of aimlessly, I ended up with lots of photos that were only so-so and lacked interest (at least in my opinion). They were just photos of something, or anything. There was no purpose, other than documenting something that I saw. There is nothing wrong with taking and sharing photos that you don’t consider a sure winner - I do that all the time.
But of course you want more and more of your shots to be winners, and that is my aim just as it is everyone else’s. I guess I am trying to evolve both my approach and my outcome.
Things are changing…or technically, they already have changed.
My library is plenty large now, and I have a backlog of photos from lots of different cities around the world that I haven’t even looked at in months, and I suspect there are some good ones in there (ok, I know for sure there are some good ones in there). Now I am not planning to stop shooting or traveling in order to catch up. In fact, I prefer not to catch up. It’s more fun for me that way. I will still take a lot of shots.
But I have definitely slowed down in terms of my shooting. Now I am thinking about quality, not quantity. I want a full library, but I want it to be full of something that is beautiful, or interesting, or preferably both. I want quality photos in there just waiting to see the light of day. I am not interested in “filler” any more.
Not a lot of “small stuff” for me
So, I seek out the cool, beautiful, interesting stuff and try to photograph that. I skip what I consider the “small stuff”. There’s nothing wrong with small stuff – I’ve seen incredible photos of everyday things. I’m always blown away when I see something common presented in an interesting and original way. Anything can be beautiful, if photographed right. It’s just not my thing right now. I’m in a different phase, I guess. And I have to admit, I don’t think I was very good at that sort of photography.
And by the way, some of the things that I shoot now would be considered “small stuff” by someone else. For example, when I am in Europe, I love to shoot their train stations. I am fascinated by them. Someone else might just want to shoot a grand landscape or cityscape, and consider a train station too mundane for their tastes. That’s cool, I get it. To each his own.
I first noticed this trend with my iPhone, actually. I have taken thousands of iPhone shots over the last couple of years. I’m not exaggerating either. The storage on my iPhone got nearly full, so I pulled a few thousand photos off of it…then filled it up again. I cleaned it out a few months ago, and while it is growing back up in size, it’s not growing as quick. I’ve slowed down there, too.
So what does all this mean?
I’m not sure what it means. For sure it means I am taking fewer photos, but hopefully the ones I do take are more meaningful, or beautiful, or interesting, or something like that. I definitely do not feel the need to just take any photo now. I’m looking for specific things that catch my attention. I want to be inspired.
To be clear, I still take a LOT of photos on a trip. On my recent trip to Germany, I returned with about 2500 shots. So it’s not like I am cutting it down to a small amount, it’s just that more thought and planning are going into those that I do take.
It also means the library will not grow as quickly, but again that’s ok with me, because I don’t want to fill it up for the sake of filling it up. I want cool stuff in there. Plus, that means it won’t take as long to back up my hard drive. :-)
And lastly, I guess it means I am maturing as a photographer. I know what I like to shoot, and what I am not as interested in shooting. I can tell if something is going to look good as a photo, before I take the photo. I am finding my rhythm. I am getting in my groove. I know what I like to blog about. I know what inspires me. I know the style of processing that I like to take with a photo, way before it’s time to process the photo.
In other words, I’m getting better and my focus is improving. :-) Thanks for listening.
Cupid's Span

You may have caught a glimpse of this magnificent work of art in a recent post of mine, but I thought it was fitting to make it the centerpiece this time around since I find it so interesting. This creation sits along The Embarcadero in San Francisco, near the Bay Bridge (which you can see in the distance). I think it is pretty cool, and it is definitely large when you are up close.
From the web: "Cupid's Span" by Claes Oldenburg and Coosje van Bruggen, was built in 2003 along the Rincon Park area. Resembling Cupid's bow and arrow with the arrow implanted in the ground, the statue symbolizes the place where Tony Bennett "left his heart".
Losing it

Well, not a lot of technical detail to discuss on this shot. I was out to lunch with the family, and of course my camera was with me. I liked the light streaming through the window in the background and I thought it cast a nice glow on the table. I was looking at the glass and thought an ice cube could look nice sitting there, so I grabbed one and plopped it on the table...
I rather like the result. It seems cinematic or artistic to me in some way. I can't quite put an accurate description on it but think it is interesting in it's simplicity. Maybe that is it...
By the way, the title of this photo is from a song by Rush of the same name. It is awesome and if you are not familiar with it, I recommend that you go listen to it immediately. They have a huge body of impressive work and I feel this ranks among their best.
Single exposure, f/5.6, 0ev, ISO 100. Minor contrast adjustments in PSE and some straightening in Aperture.
Contemplation
 Recently we popped over to The Blanton Museum of Art to check out their Renaissance exhibit, which is fabulous. I really enjoy going to a museum and observing the various types of interesting things they have on display. I am a big fan of the Renaissance (who isn't really?) but I appreciate other styles as well. When I walked into this gallery, I immediately noticed the gentleman sitting there, seemingly contemplating the work of modern art hanging in front of him. Or maybe he was tired and isn't a museum type. One thing I find a little frustrating is that they allowed me to take some shots on the tripod in the lobby and downstairs, but would not allow a tripod into the exhibits upstairs. I understand the "no flash" rule and appreciate that (and abide by it), but it makes no sense to me why I can't take shots from my tripod. I am not sure what they hope to accomplish with that rule.
This is a single exposure taken at f/7.1 for 0.6 seconds. Exposure bias was -1.0ev and the ISO was 100. I made some minor adjustments in PSE, mostly around Contrast, then smoothed it out a little in Topaz Adjust and finished it in Aperture by straightening a little and fixing a couple of minor blemishes.